This post may contain affiliate links. Please read our disclosure policy.
Well it’s like when I had this garden party for my father’s birthday, right? I put R.S.V.P ’cause it was a sit-down dinner. But some people came that like did not R.S.V.P. I was like totally buggin’. I had to haul ass to the kitchen, redistribute the food, and squish in extra place settings. But by the end of the day it was, like, the more the merrier. ~Cher Horowitz
A couple of weeks ago, Liberty and I had a “formal meeting” to discuss what I wanted to get out of doing this blog. At first I didn’t really understand why we needed to have an in-depth conversation about this, since I thought the answer was obvious. However, I can now see that this site is not just a stepping-stone towards a kick-ass cooking show and acquiring an incredibly attractive male personal assistant; it’s also an important “learning experience.”
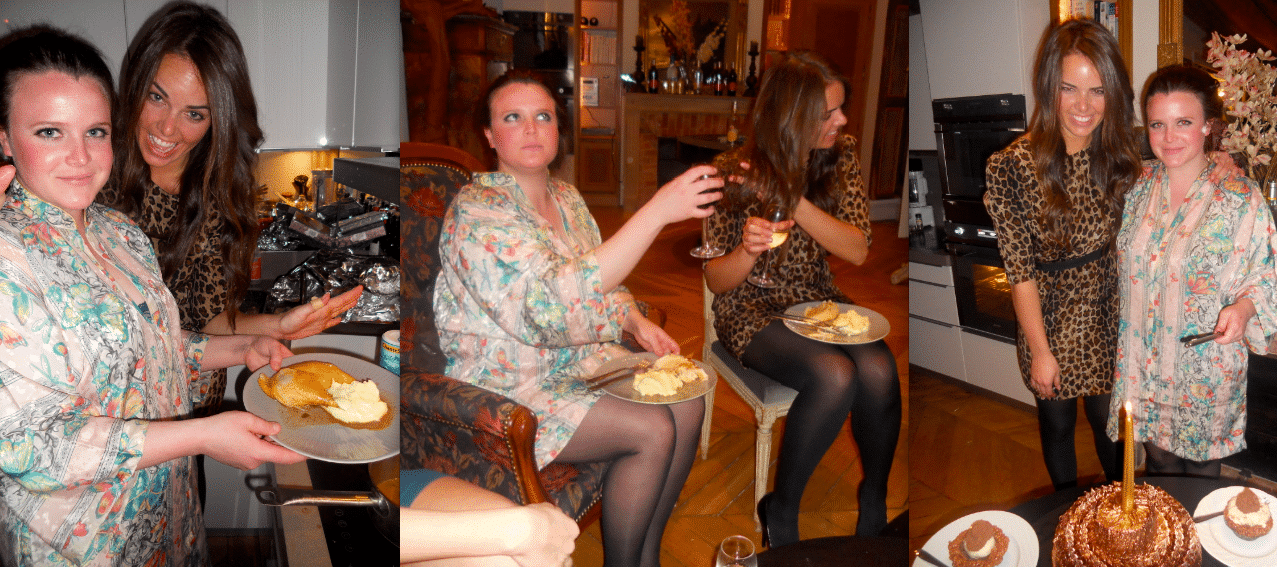
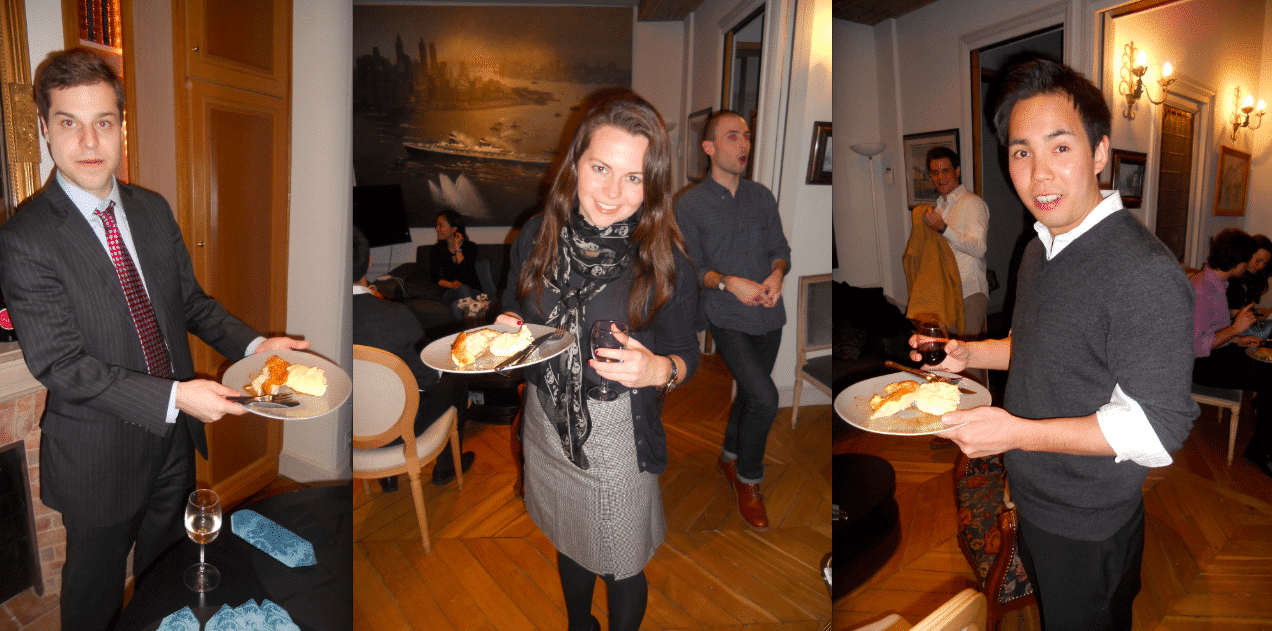
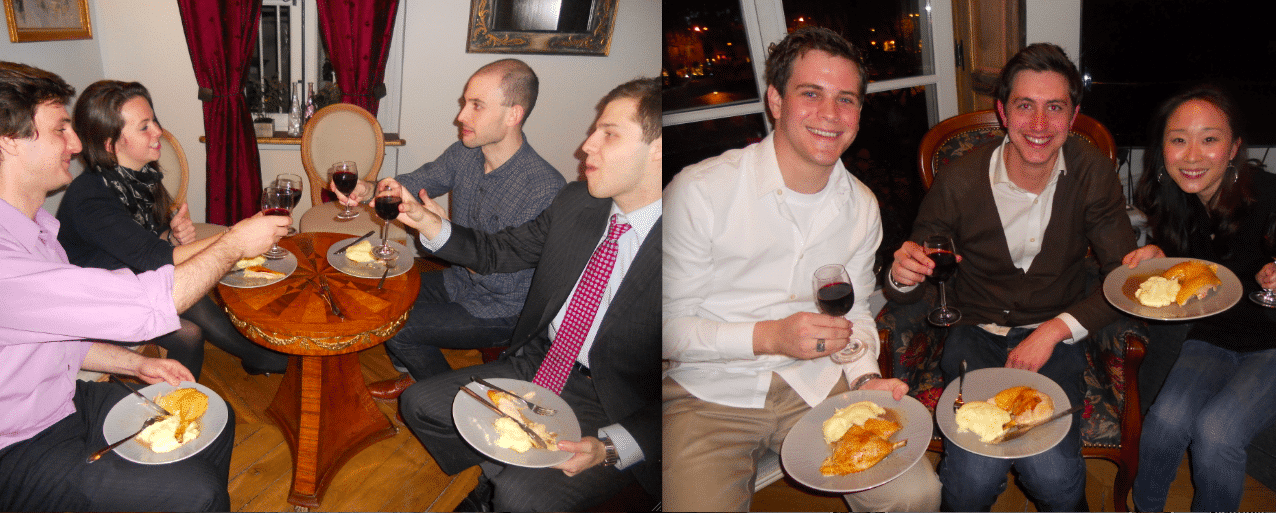
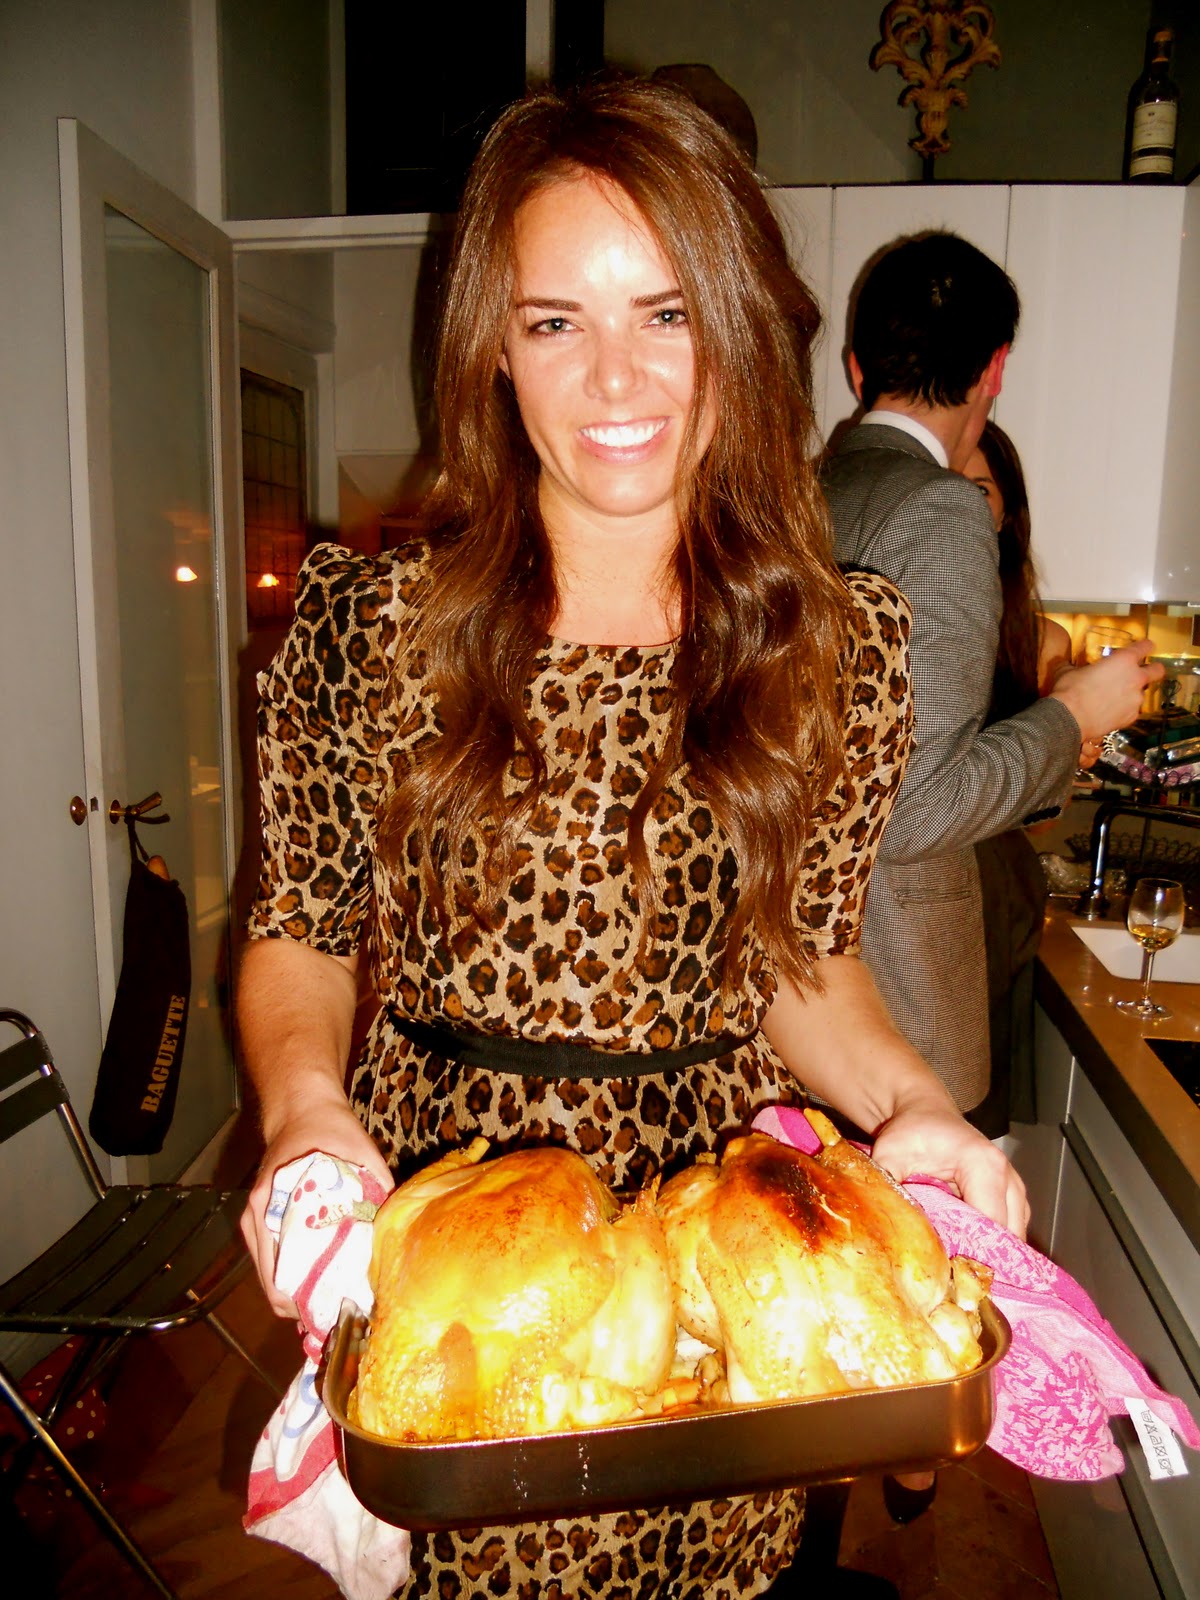
Therefore, when I received an email from Liberty saying that she had invited 24 people to dinner for my birthday, I chose not to have a hernia. Rather, I decided to view this “exciting opportunity” as a “learning experience.” By some grace of God, Liberty managed to cut the list down to 17, which was so much more manageable! According to Liberty, everything was going to be super easy. I could just roast like five chickens and make a big vat of mashed potatoes. Sure. Easy as a boxed cake.
Because I had class the day of our dinner party, Liberty very generously offered to do all of the shopping. She called me from the market saying that their chickens did not look up to snuff, so she was going to try a local butcher’s shop. I admired her courage and Parisian sense of adventure, sending her forth to le boucherie with high hopes. She triumphantly called a half hour later to inform me that she had purchased the “most beautiful chickens she had ever seen.” Apparently, Liberty hasn’t seen very many chickens.
When I arrived at Liberty’s apartment that afternoon, she happily unveiled the groceries. Due to unforeseen “stock issues,” the produce was a pretty pathetic sight. We’re talking oddly shaped potatoes, suspiciously cracked carrots, slightly brown onions, etc. However, all of this was momentarily overlooked, as Liberty was eager to reveal the prized chickens. When I unwrapped the chickens from their packaging, I found several birthday surprises. I suppose my lack of effusive praise for the chickens’ beauty, or perhaps my lack of words in general, tipped Liberty off to the fact that there may be something wrong with her babies. “Liberty…why do the chickens still have their feet? And, more importantly, WHY DO THEY STILL HAVE THEIR NECKS?” Response: “Is that bad?

Now, cutting feet off of a chicken is never super fun, but it’s not the end of the world. Necks on the other hand…UNFORGIVABLE. I don’t know if I can adequately describe exactly how a chicken neck looks after it has been beheaded and de-feathered. Luckily, Sivan did it for me: “Can’t you cook it with the neck on? It looks like a flaccid penis, Serena. I really don’t think you want to touch it.” Yeah, well you can’t always get what you want. Unfortunately, cooking the chicken with the neck on would dry out the meat and make it very ugly to carve later on (I know these things because I go to Cordon Bleu, thank you very much). Because I didn’t happen to be traveling with my meat cleaver that particular afternoon, Liberty and I took turns hacking away at the feet and necks of the four chickens. 45 minutes later, we were tired, sweaty, and sore, but we made those birds our bitches. Weirdly enough, I think this was a bonding experience for us.
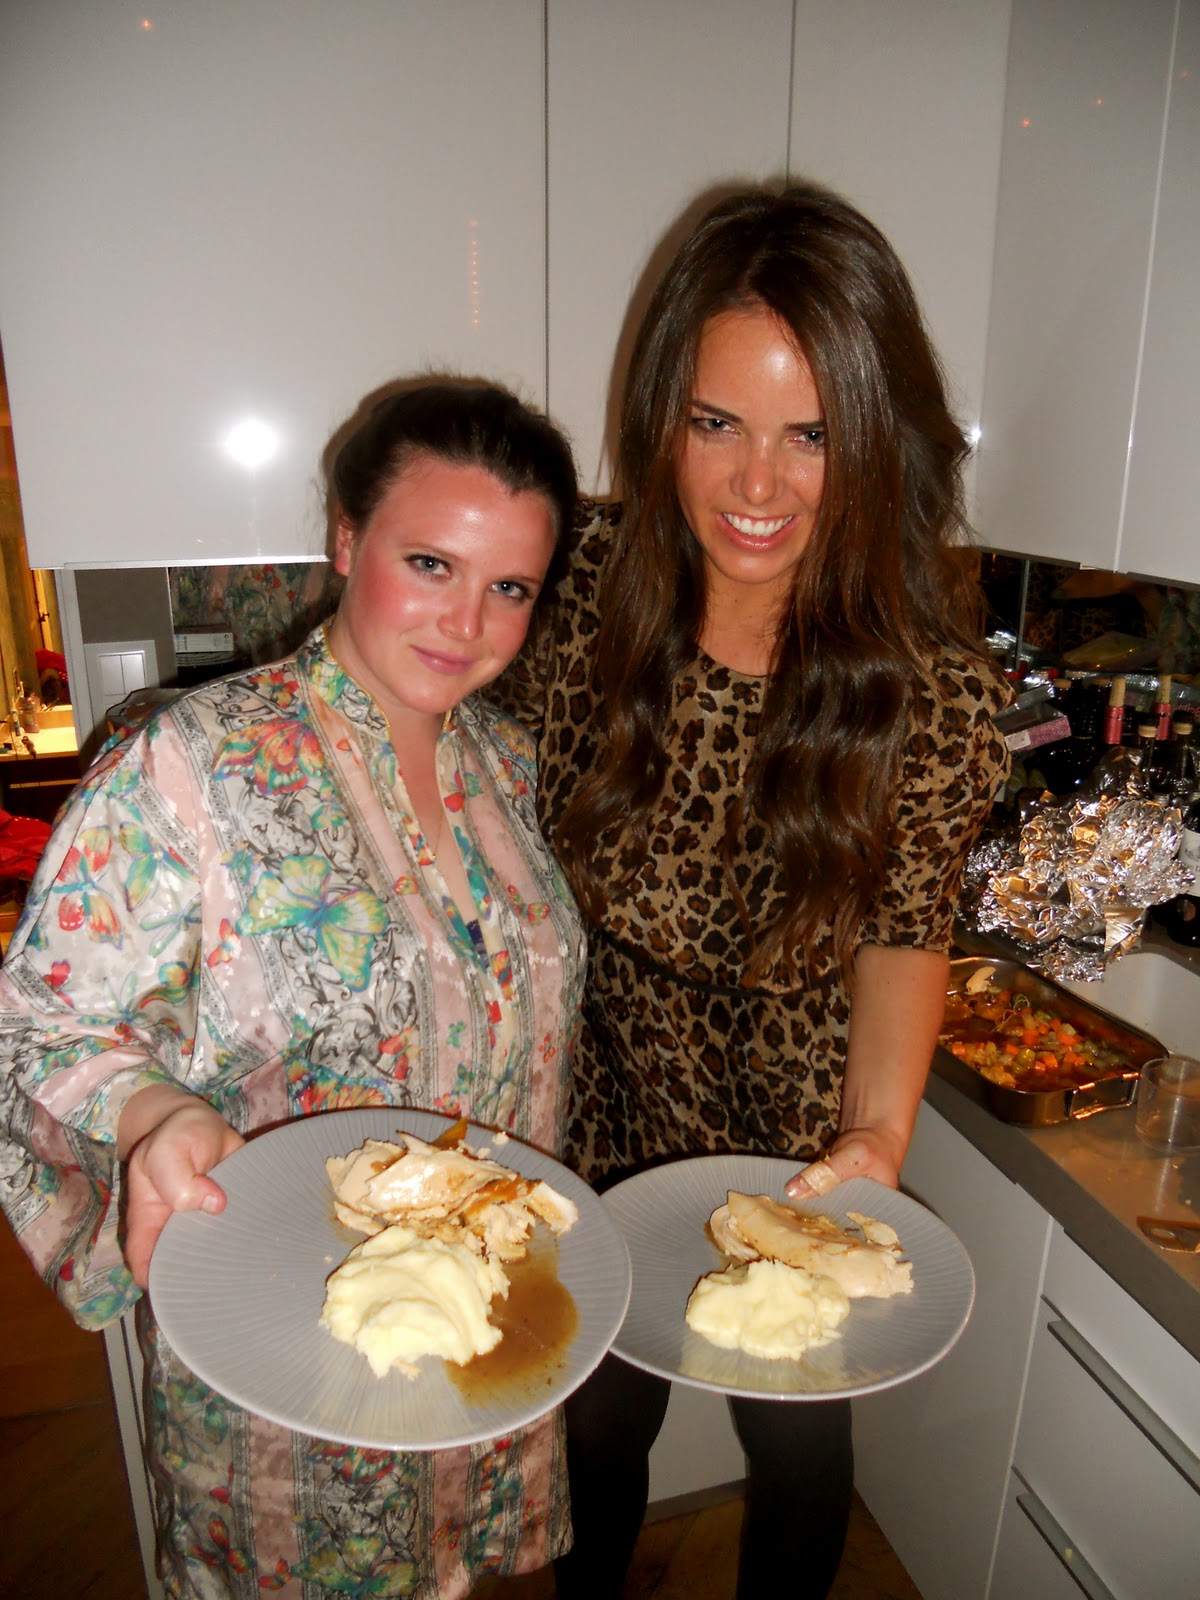
Miraculously, we got dinner on the table by 10pm. It was hot. It was not burned. It was only an hour behind schedule. Most importantly, it was delicious. People were literally speechless. It was literally silent for an entire five minutes while people ate. I’m going to assume that this was due to my domestic prowess and not to the fact that people were drunk and starving. You probably should too.

Things we learned this week:
1.) Work with what you’ve got. Small potatoes? Mealy carrots? Browning onions? No problem. Cut out the brown spots and add some extra butter.
2.) Practice makes perfect. It’s okay to make (a lot) of mistakes. So what if dinner is running a few minutes/ (hours) late? Open another (couple) bottles of wine for your guest. DO NOT PANIC. Being domestic makes you super-awesome, not super-human.
3.) Never let Liberty do the grocery shopping.
Roast Chicken with Jus (Serves 4):
Preparing your chicken:
-Pre-heat the oven to 350 degrees.
 |
| Sexy Chicken. |
-Cut the wings off just below the joint. (If necessary please also remove the feet and neck…)
-Make sure that the cavity of the chicken is clean. This means you need to remove any renegade organs/innards. If you’re squeamish, I recommend wrapping your hand in some paper towel and then swiping the cavity a few times. Just do it!*
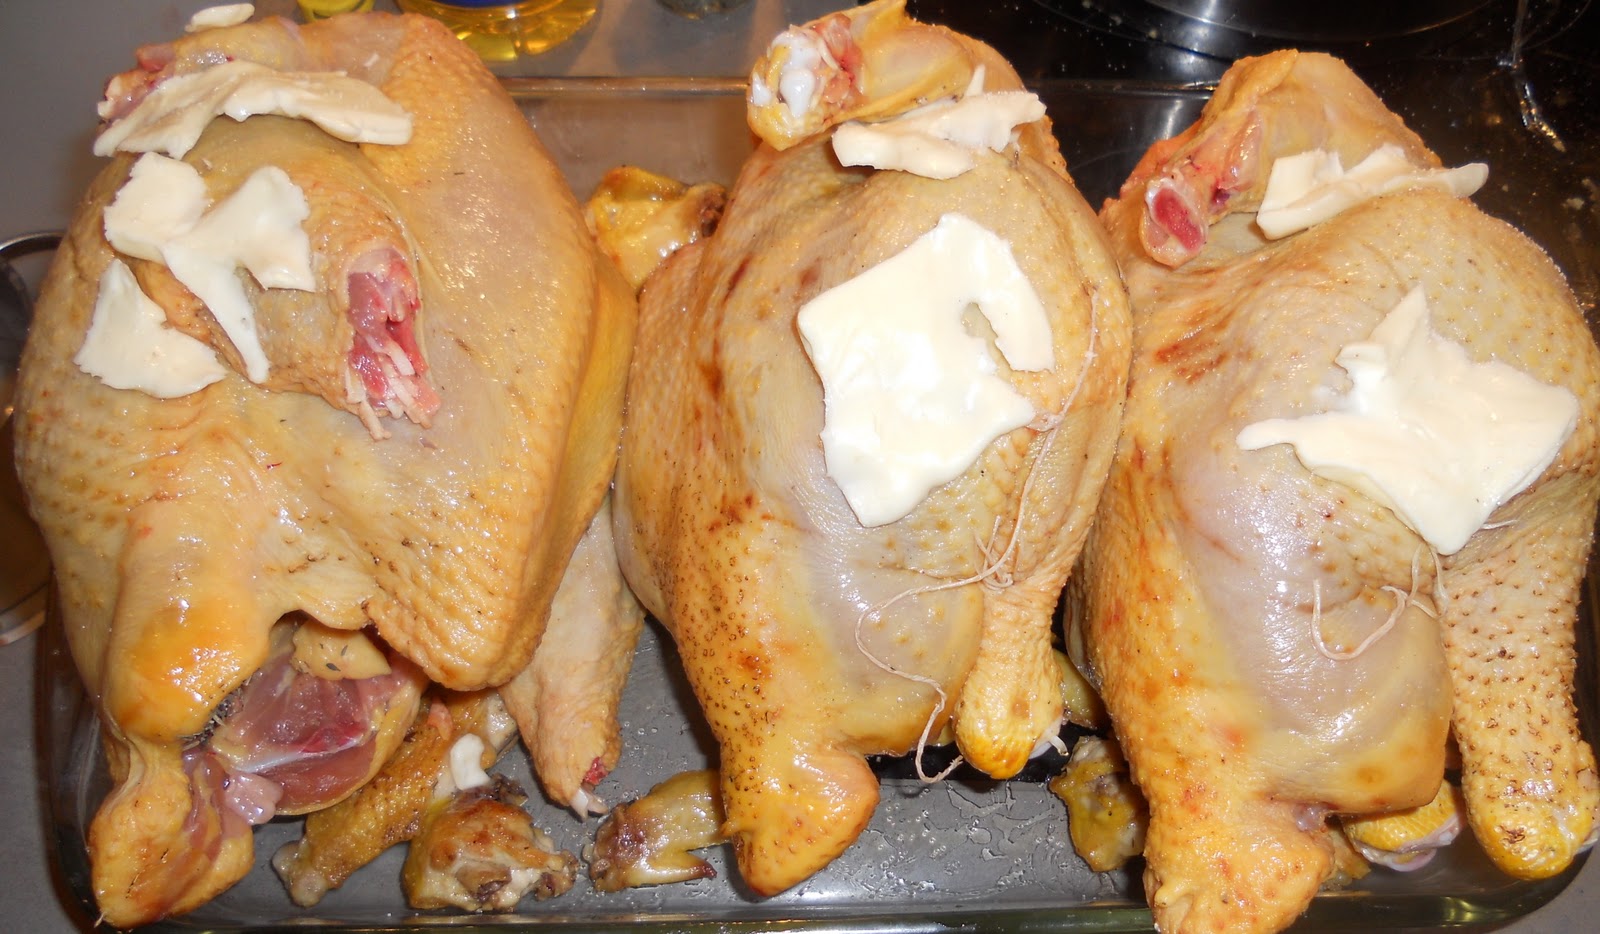
-Season the cavity with a couple pinches of salt and a pinch of pepper. Then add your two crushed garlic cloves (just smack the cloves with a knife, no need to peel them!), and a couple sprigs of thyme.
-Rub the chicken’s skin lightly with oil. (This will help the skin to crisp). Season with salt and pepper.
*NOTE: For all of you who are still early along in your domestication process, you can ask your butcher to do all of this for you. Also, if you buy your chicken at a supermarket, it will most likely already be prepared for you, you lucky bitches
Preparing your aromatic garnish:
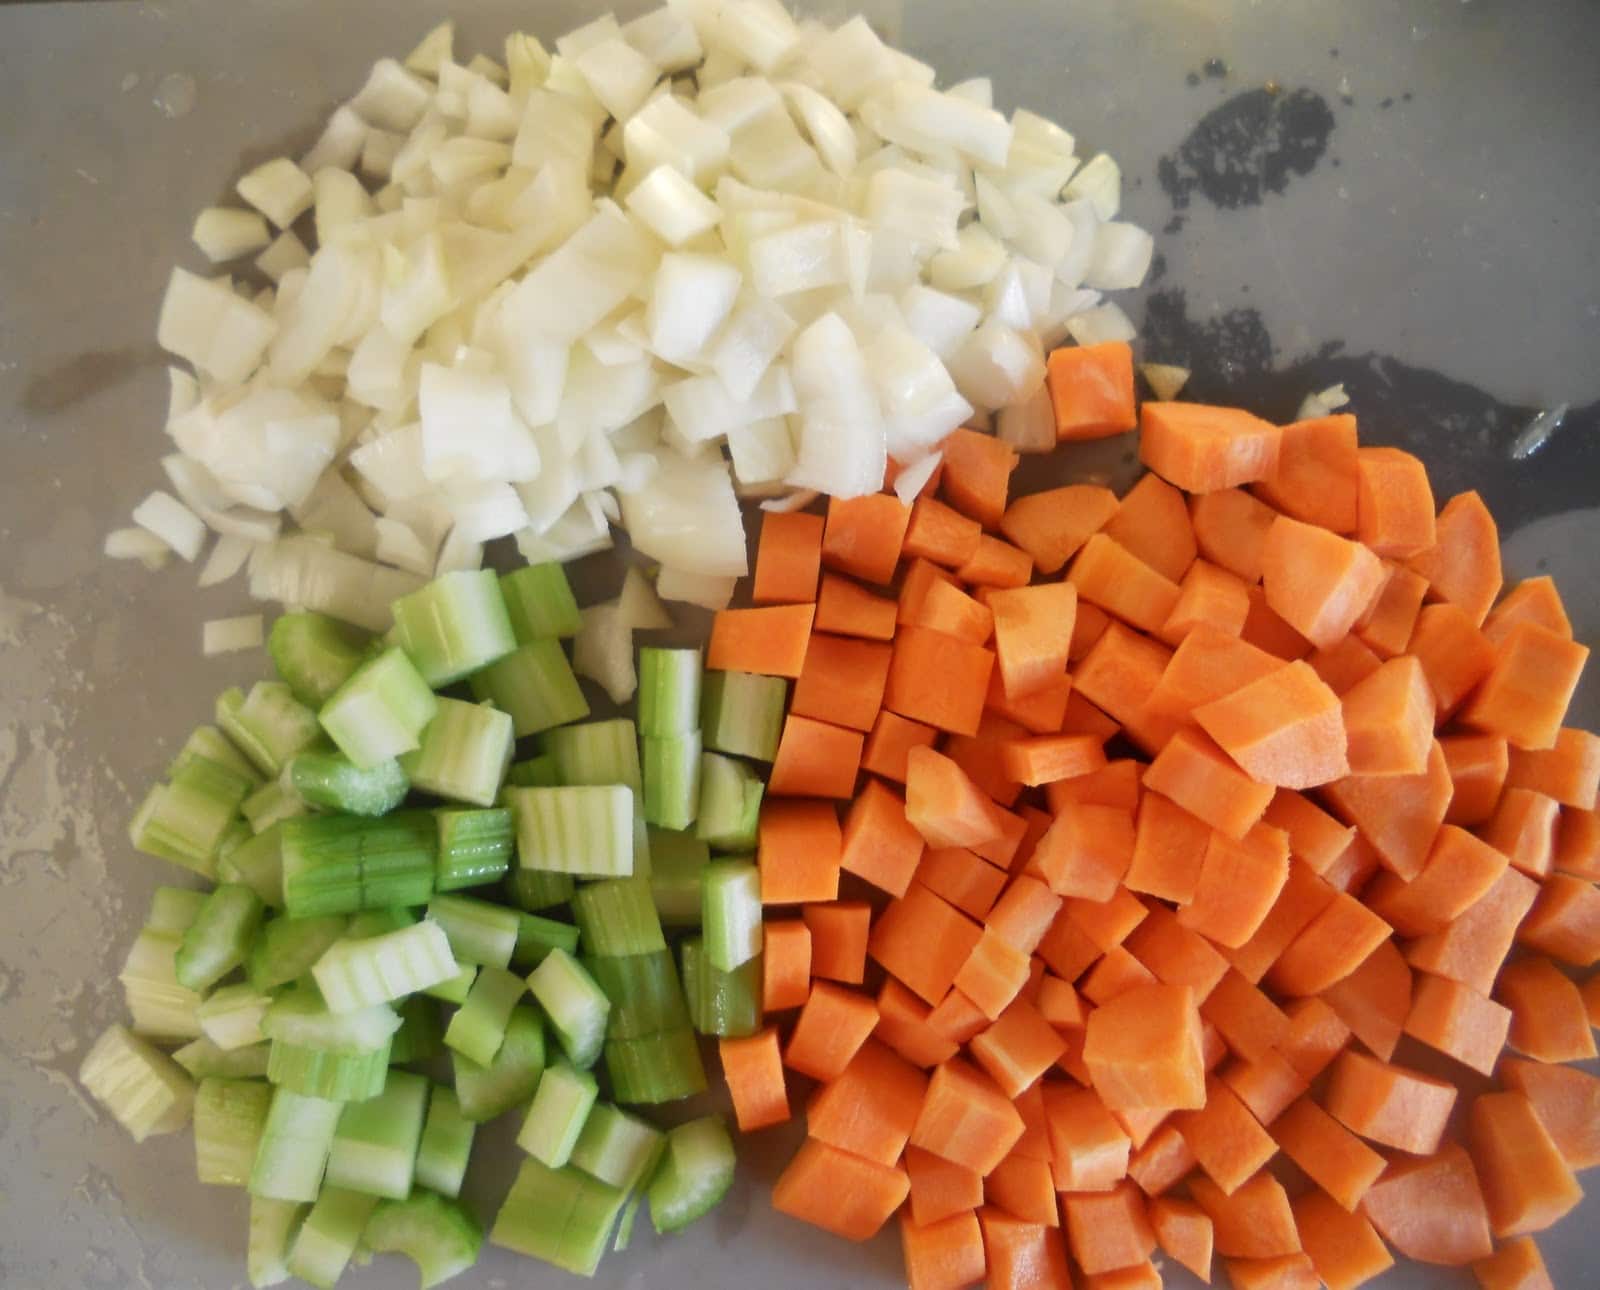
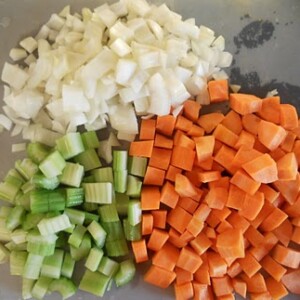
-Peel your carrots, celery, and onion, and then chop each mirepoix- this is a fancy French term that I shall poetically translate as “rough cubes.”
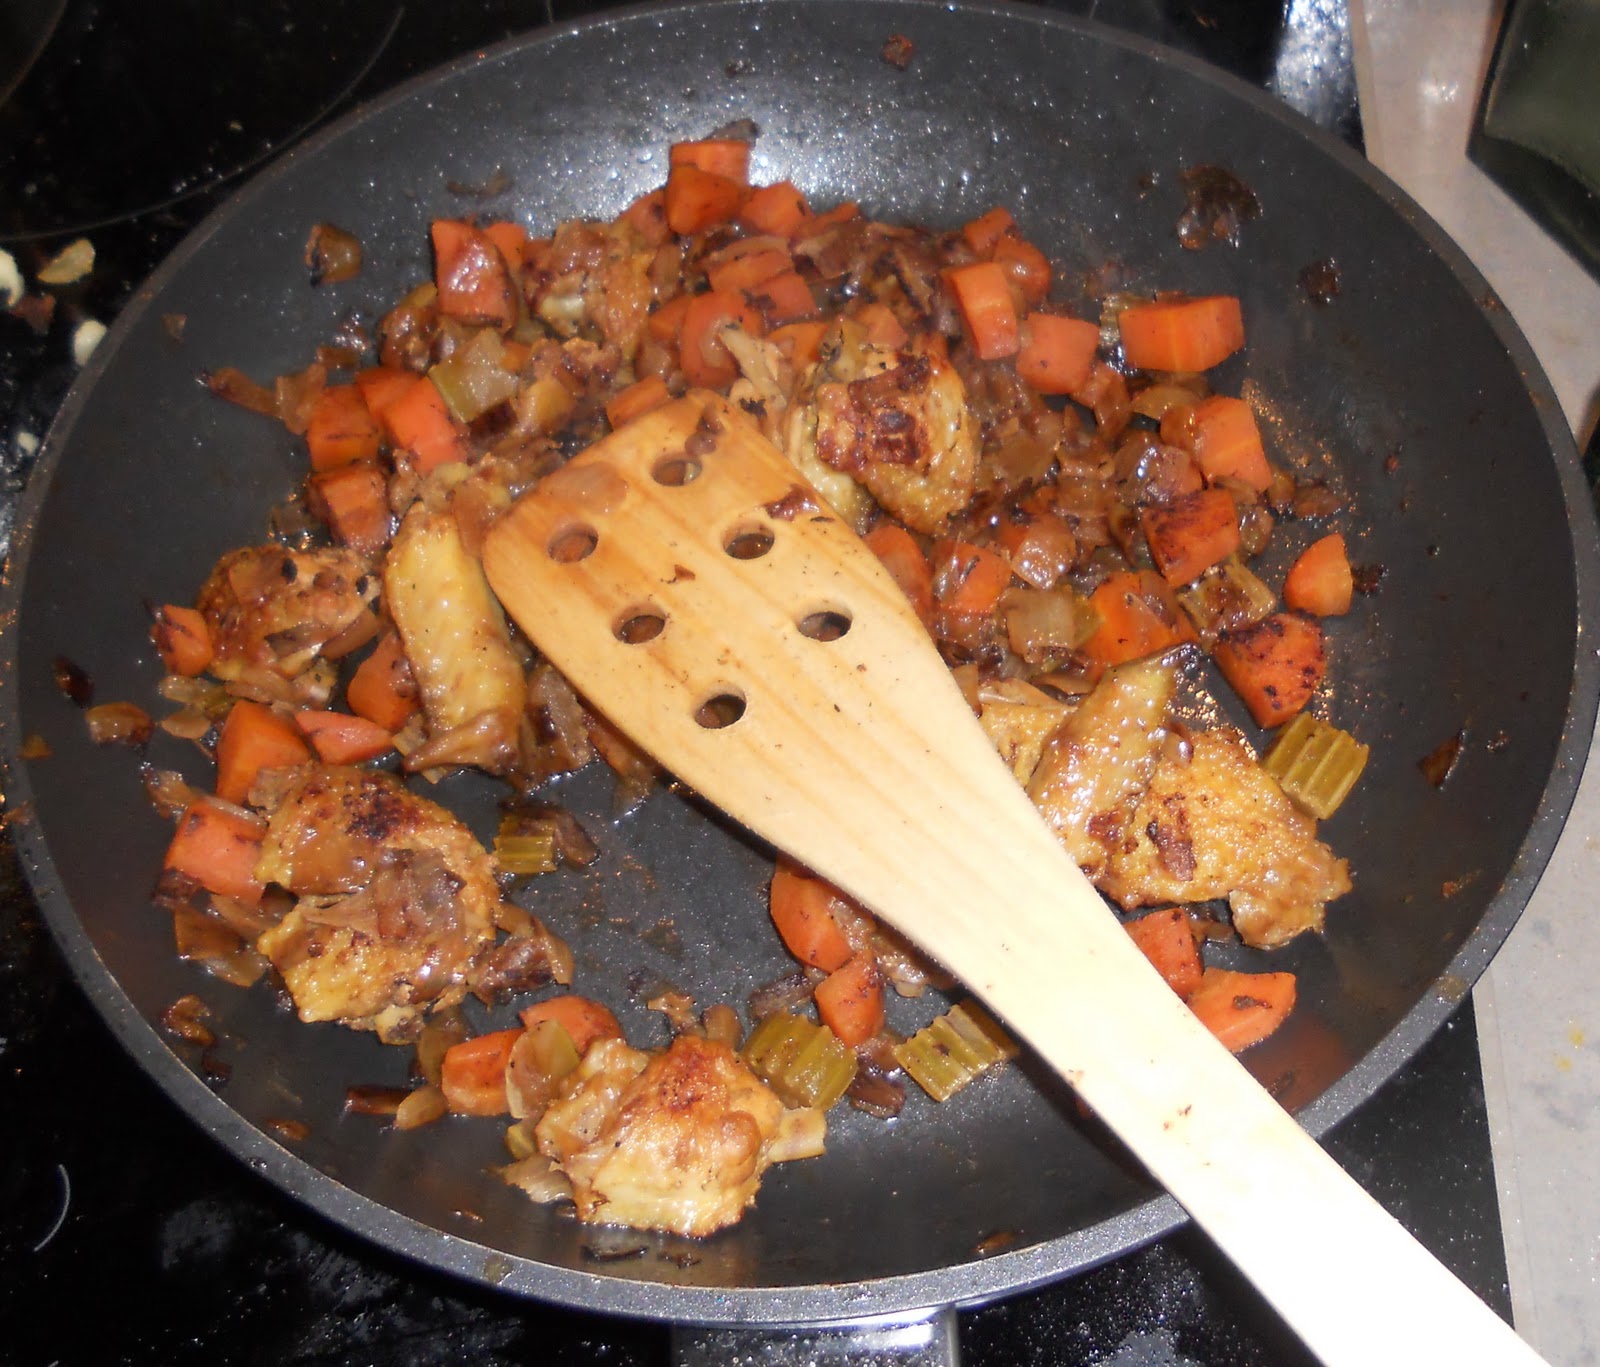
-Chop the chicken wings into small pieces. (This is best done with a cleaver, but a sharp knife will also do).
-Heat some oil in a saucepan, and when it is very hot (spitting), add the chicken wings. Keep on the heat until they are a golden brown, stirring intermittently. Remove from heat.
Cooking your chicken:
*Total cooking time approximately 50 minutes
-Place the chicken in a roasting dish on its side. Add 1 or 2 slices of butter to the skin and put yo bird in the oven.
-After 15 minutes turn your chicken onto its other side and baste it with some of its juices. (You don’t even need a baster! Just use a spoon to collect the juice and pour it over the chicken).
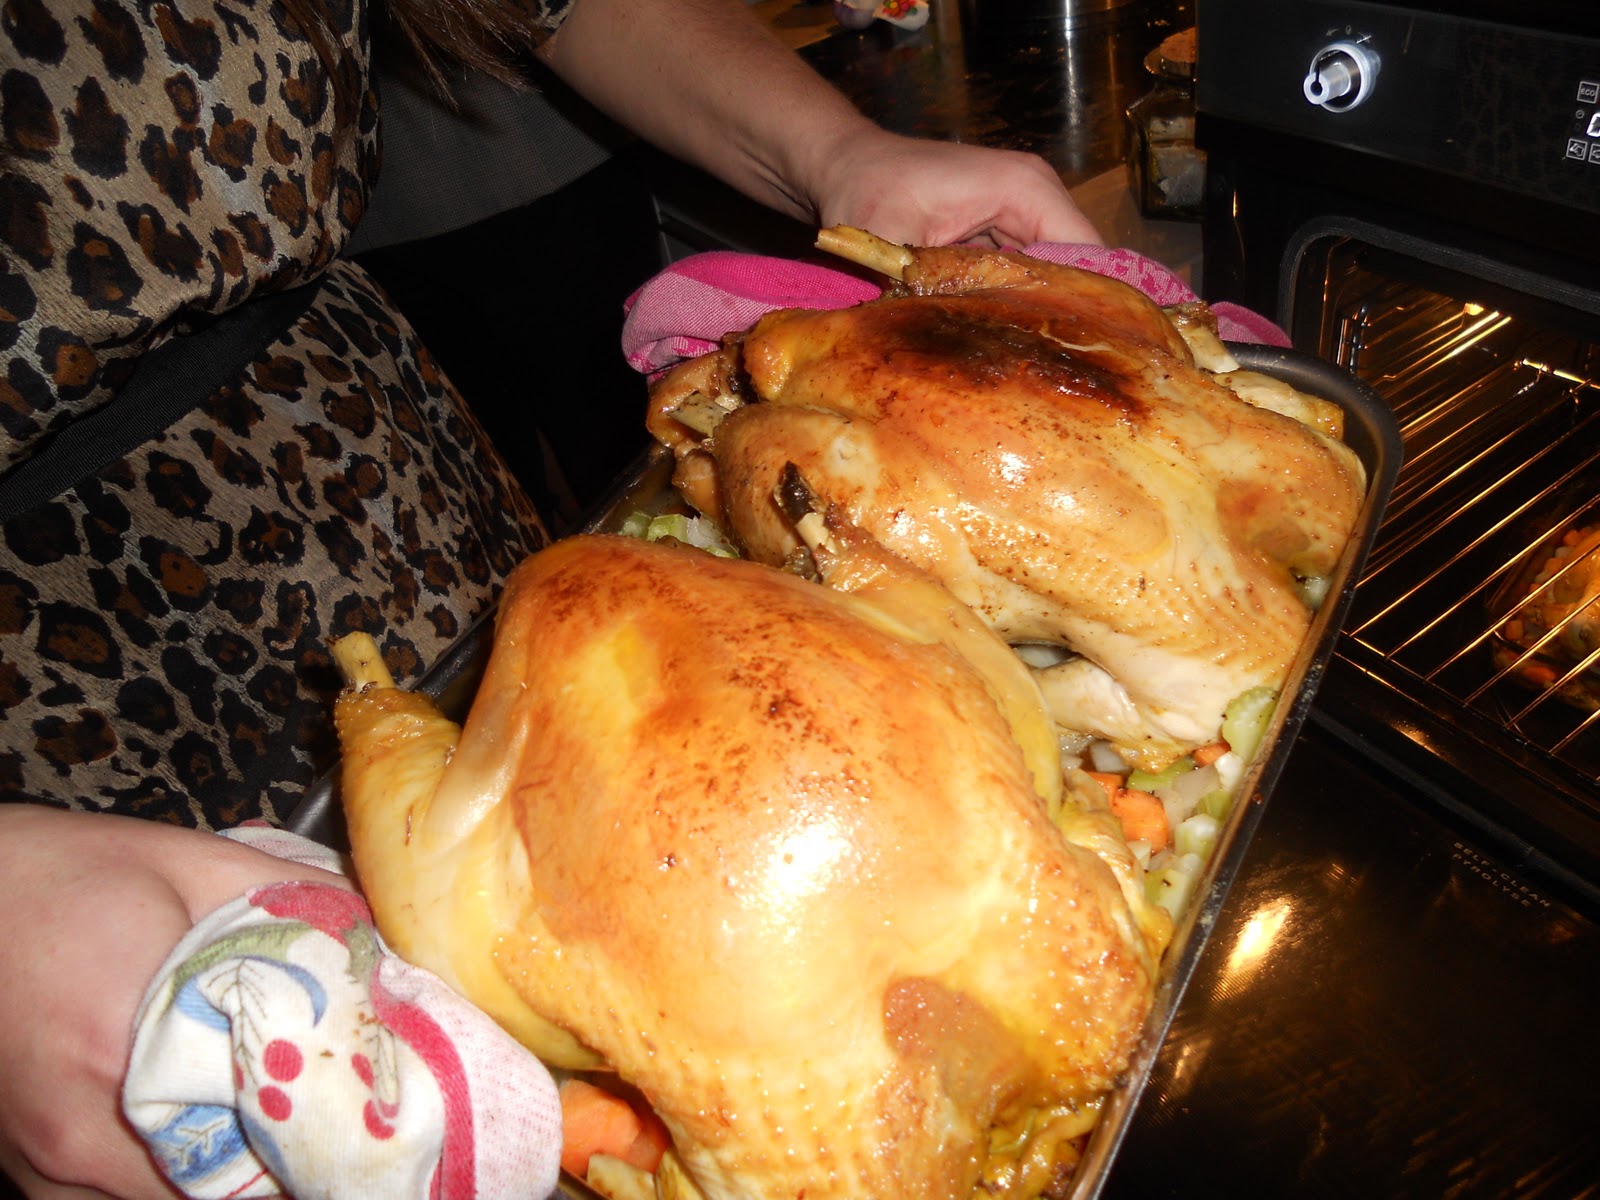
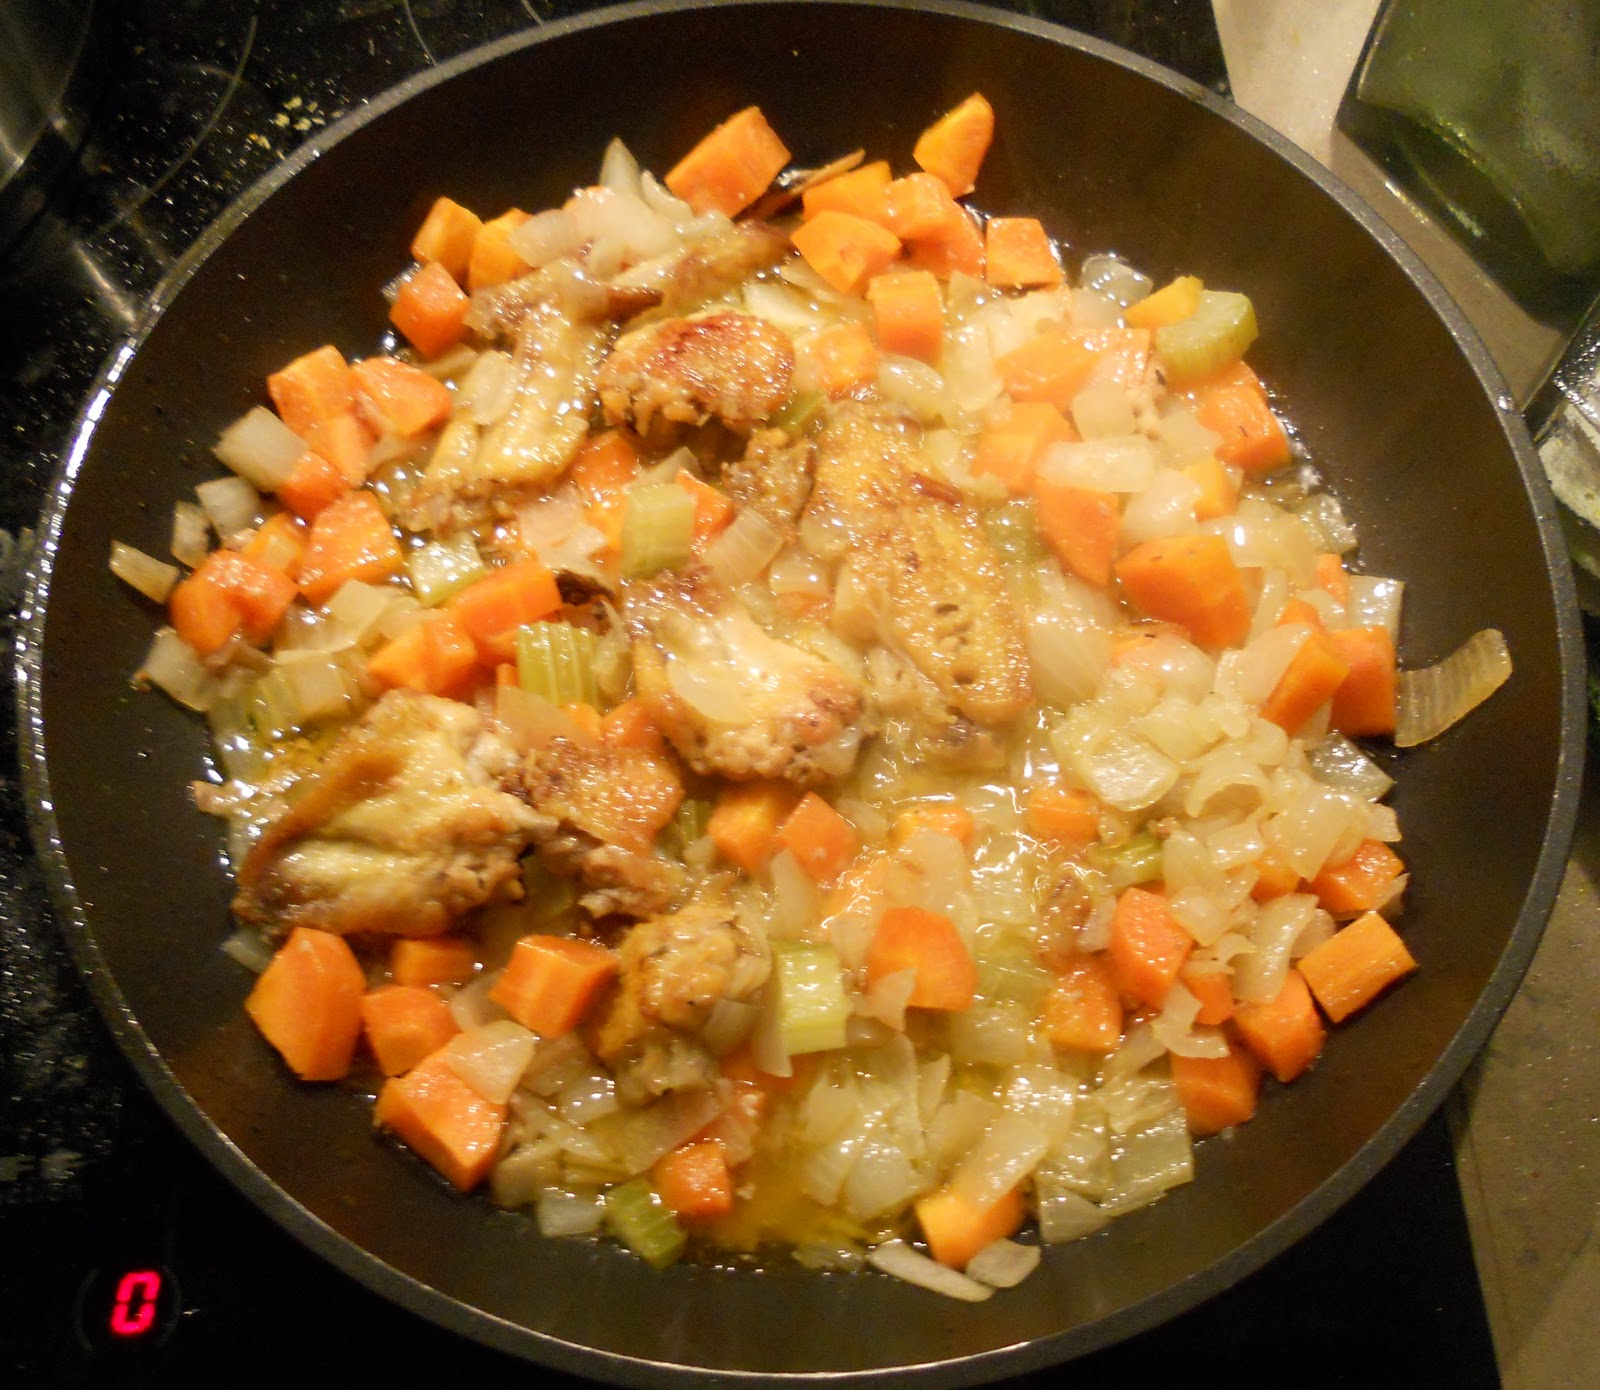
-After another 15 minutes, add the vegetables and browned chicken wings to the roasting pan. Place the chicken breast-side up on top of the garnish. Cook for 20 more minutes. Boom! Remove your chicken from the oven and cover with aluminum foil until ready to serve.
Preparing your jus:
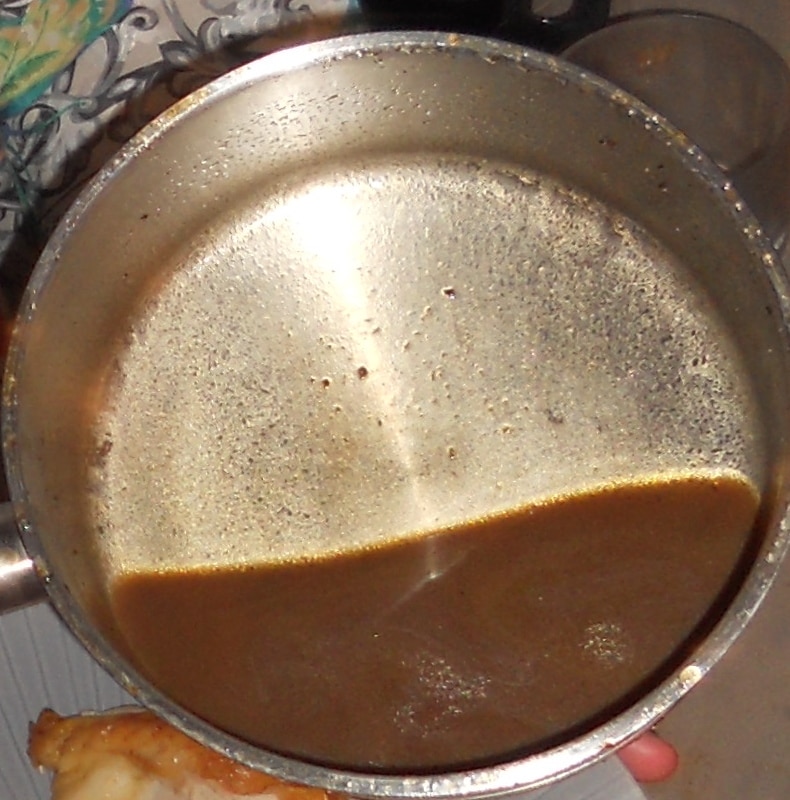
-Strain the fat from the chicken wings and vegetables that were roasted with your chicken.
-Brown the trimmings in a saucepan on medium to high heat. When brown, deglaze the pan with a little white wine (or water). This should clean the bottom of the pan and help the trimmings to absorb flavor.
-Add water to cover the trimmings and allow to simmer for at least 10 minutes.
-Strain the jus with a fine mesh strainer, and keep on the heat to reduce until it has a slightly syrupy texture.
-Taste your jus and add salt and pepper to taste.
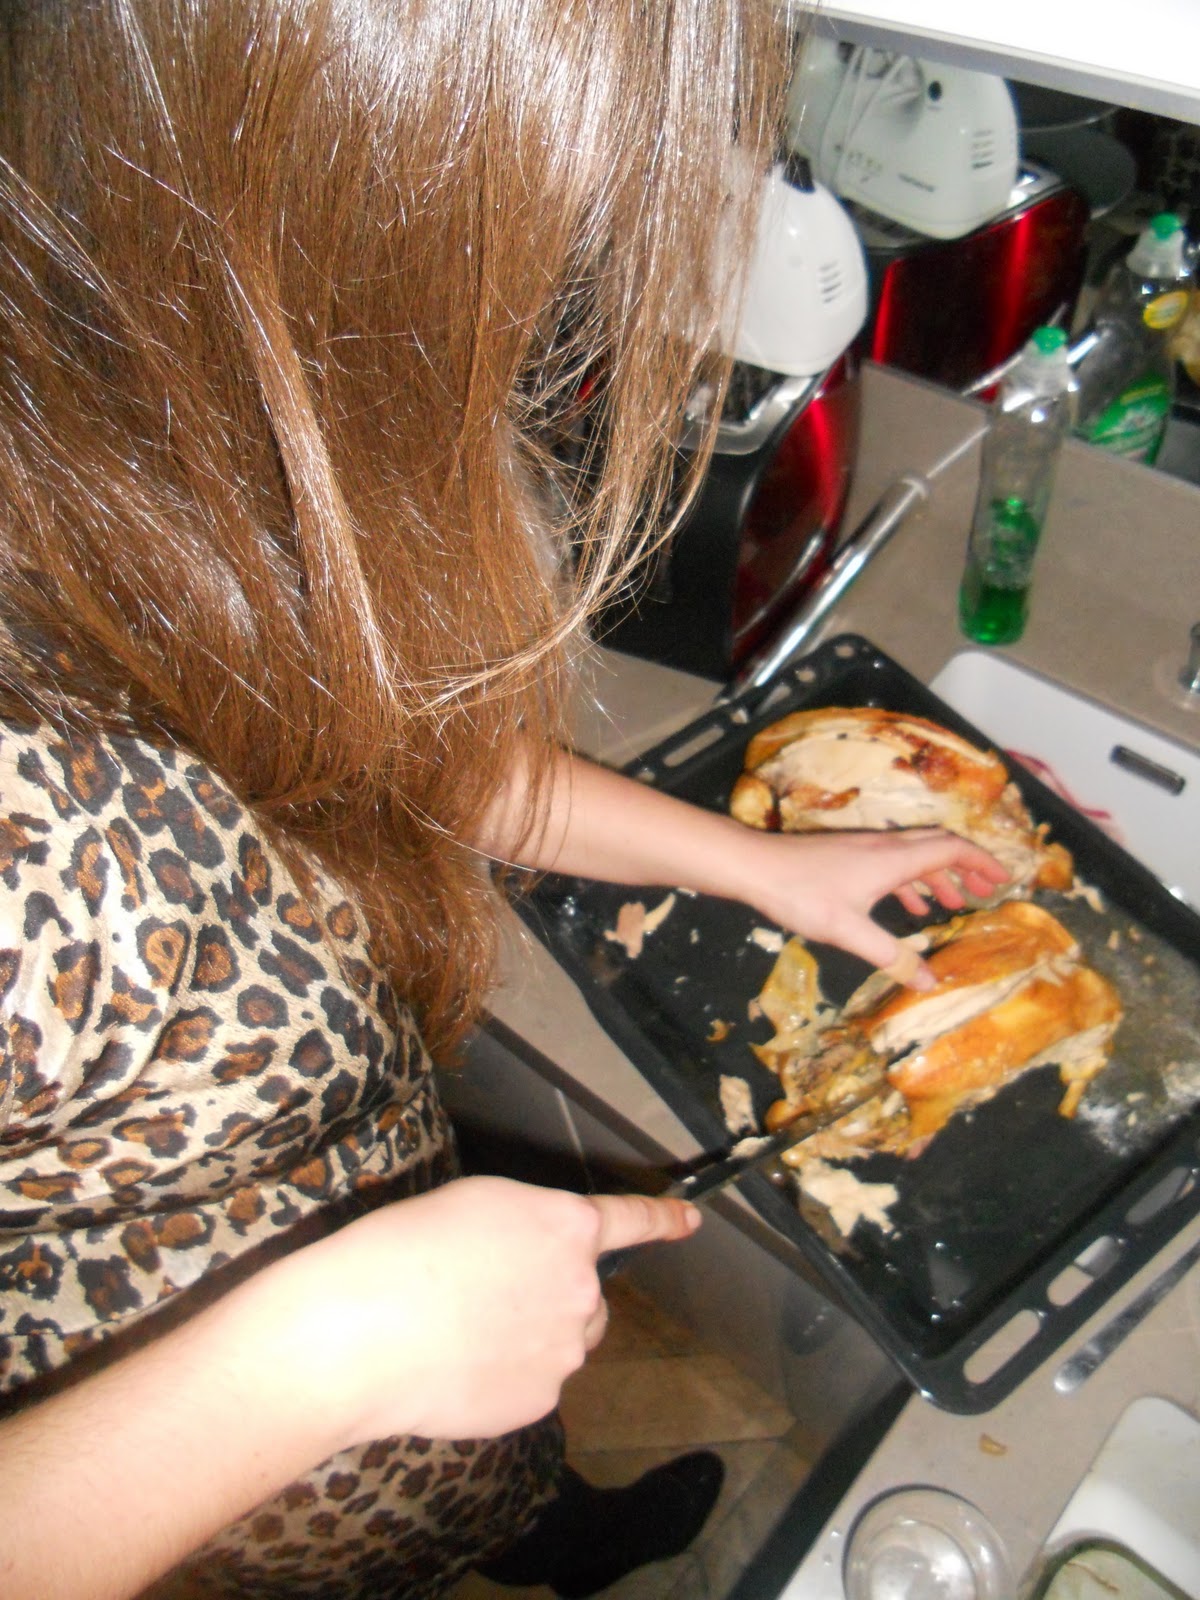
Carving your chicken:
*Each bird serves four people. There will be two thighs and two breasts (just stating the obvious).
-Remove the thighs first, cutting gently around the thigh joint (what most people thing of as the drumstick), and pull the meat away from the carcass.
-To remove the breasts, cut along the center line of your chicken. Once you find the spine, cut on either side of it to remove the breast meat. Just follow the line of the bones with your knife.
Signature Mashed Potatoes (Serve 4 HUNGRY people/8 normal people):
Ingredients:
4 large waxy potatoes
175 g butter (approx 1 stick)
1 cup milk
nutmeg
salt
Preparing your potatoes:
-Wash and peel the potatoes and put in a large pot of water with several pinches of coarse salt. (They will cook faster it you cut your potatoes in half.)
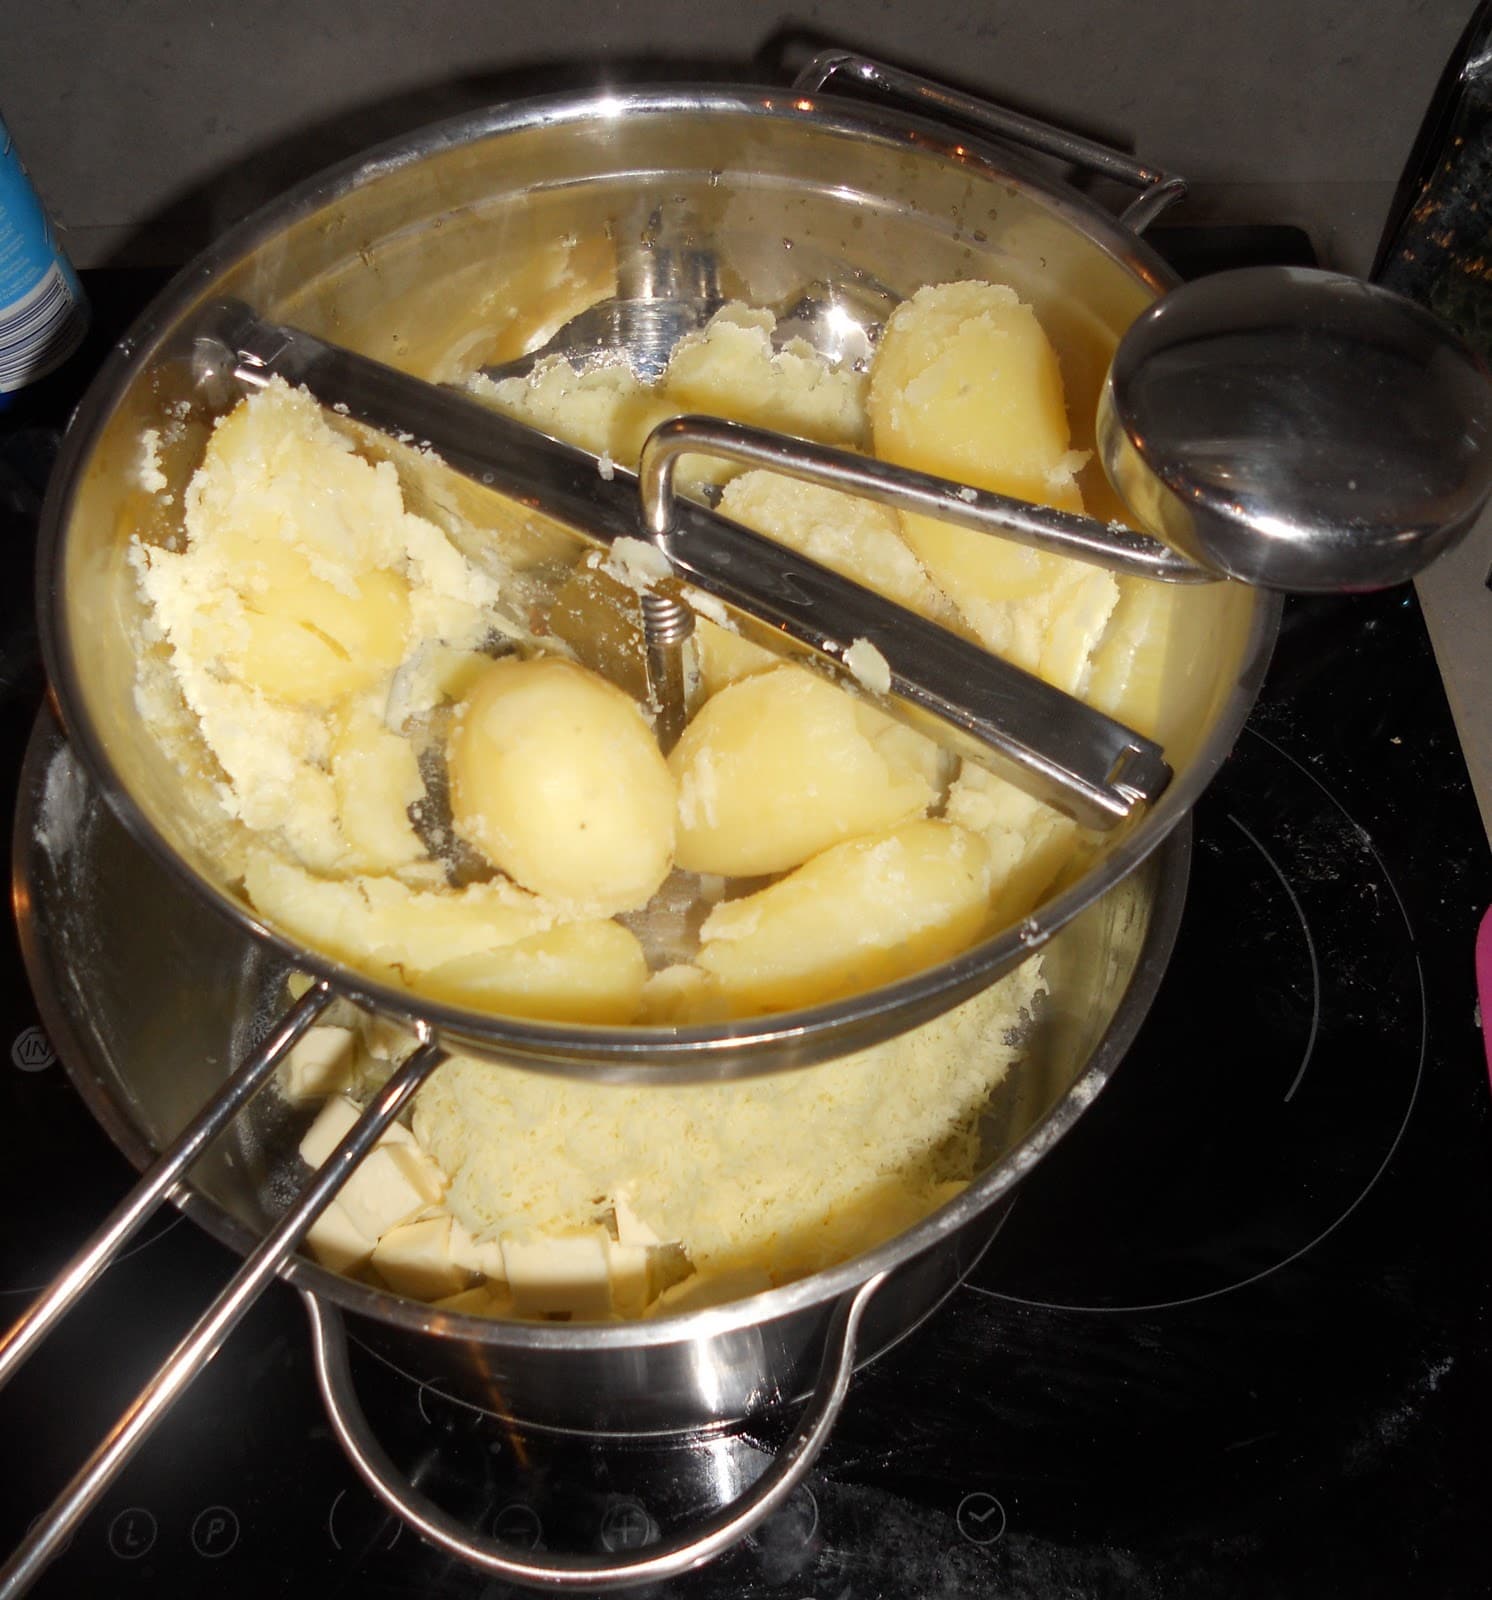
-Cut your butter into small cubes and place in a large bowl.
Cooking your potatoes:
-Boil the potatoes until very tender. (To see if your potatoes are cooked, peirce them with a knife. If the knife slides in easily, those suckers are done.)
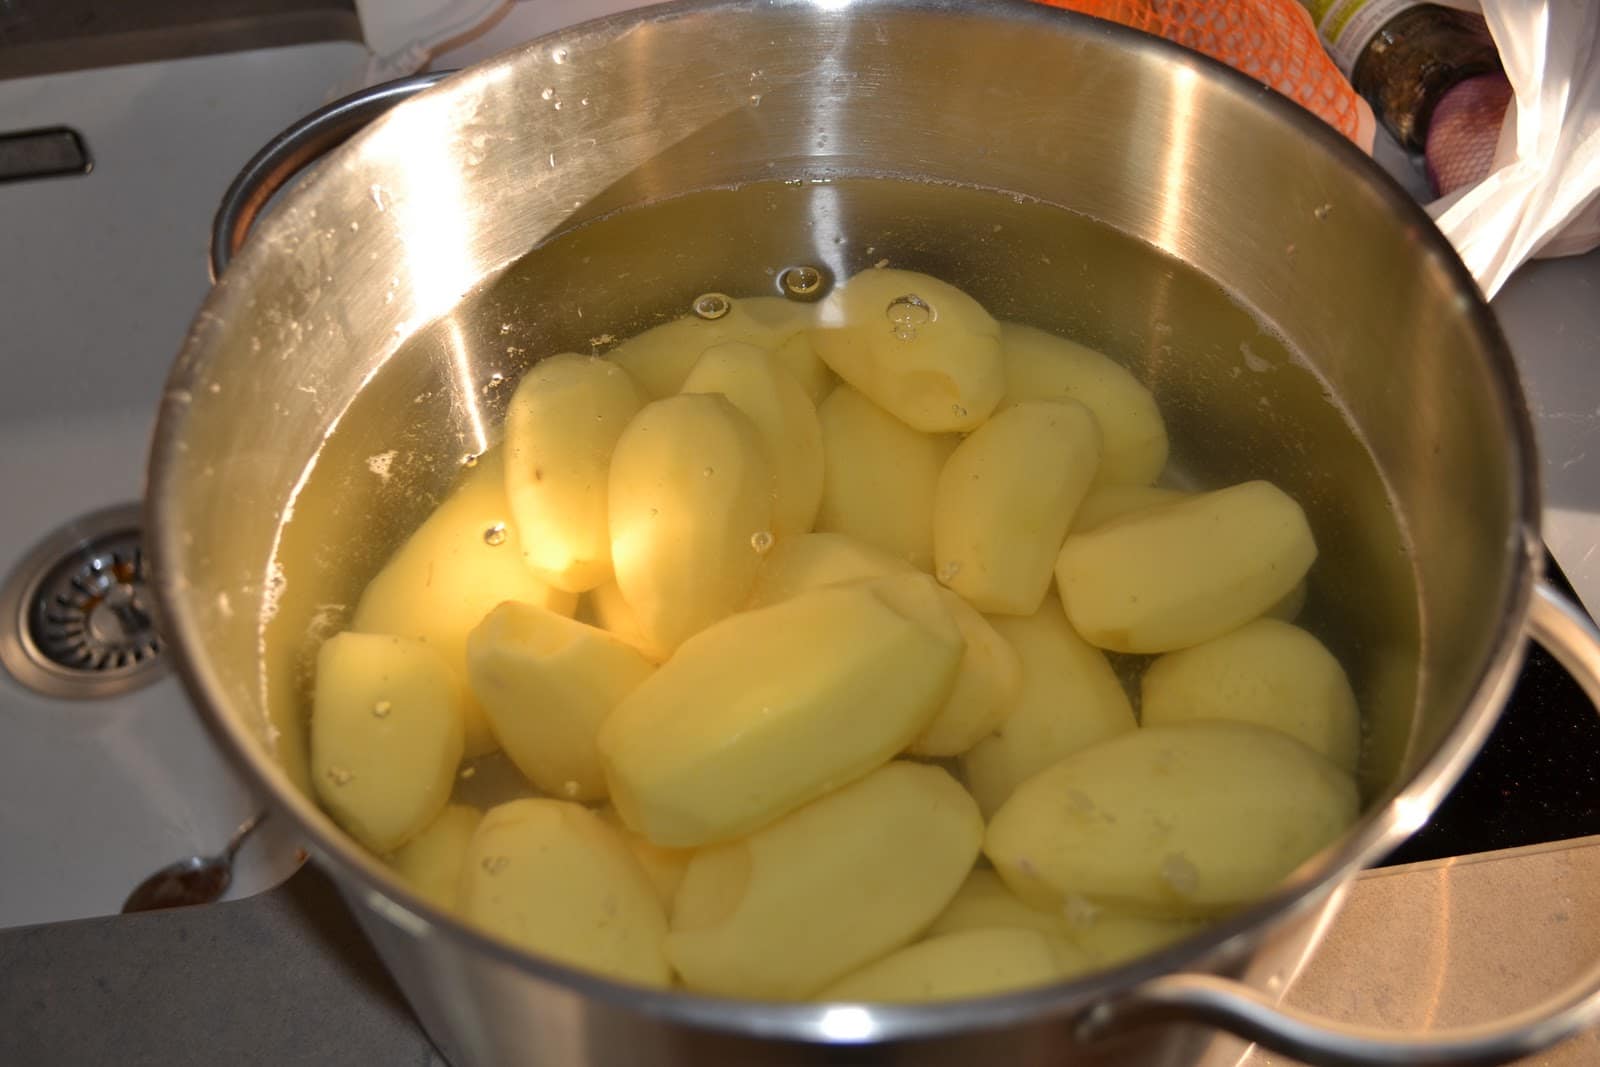
*Some white, foamy starch will collect on the surface of the water as the potatoes cook. Skim the starch of periodically with a large spoon.
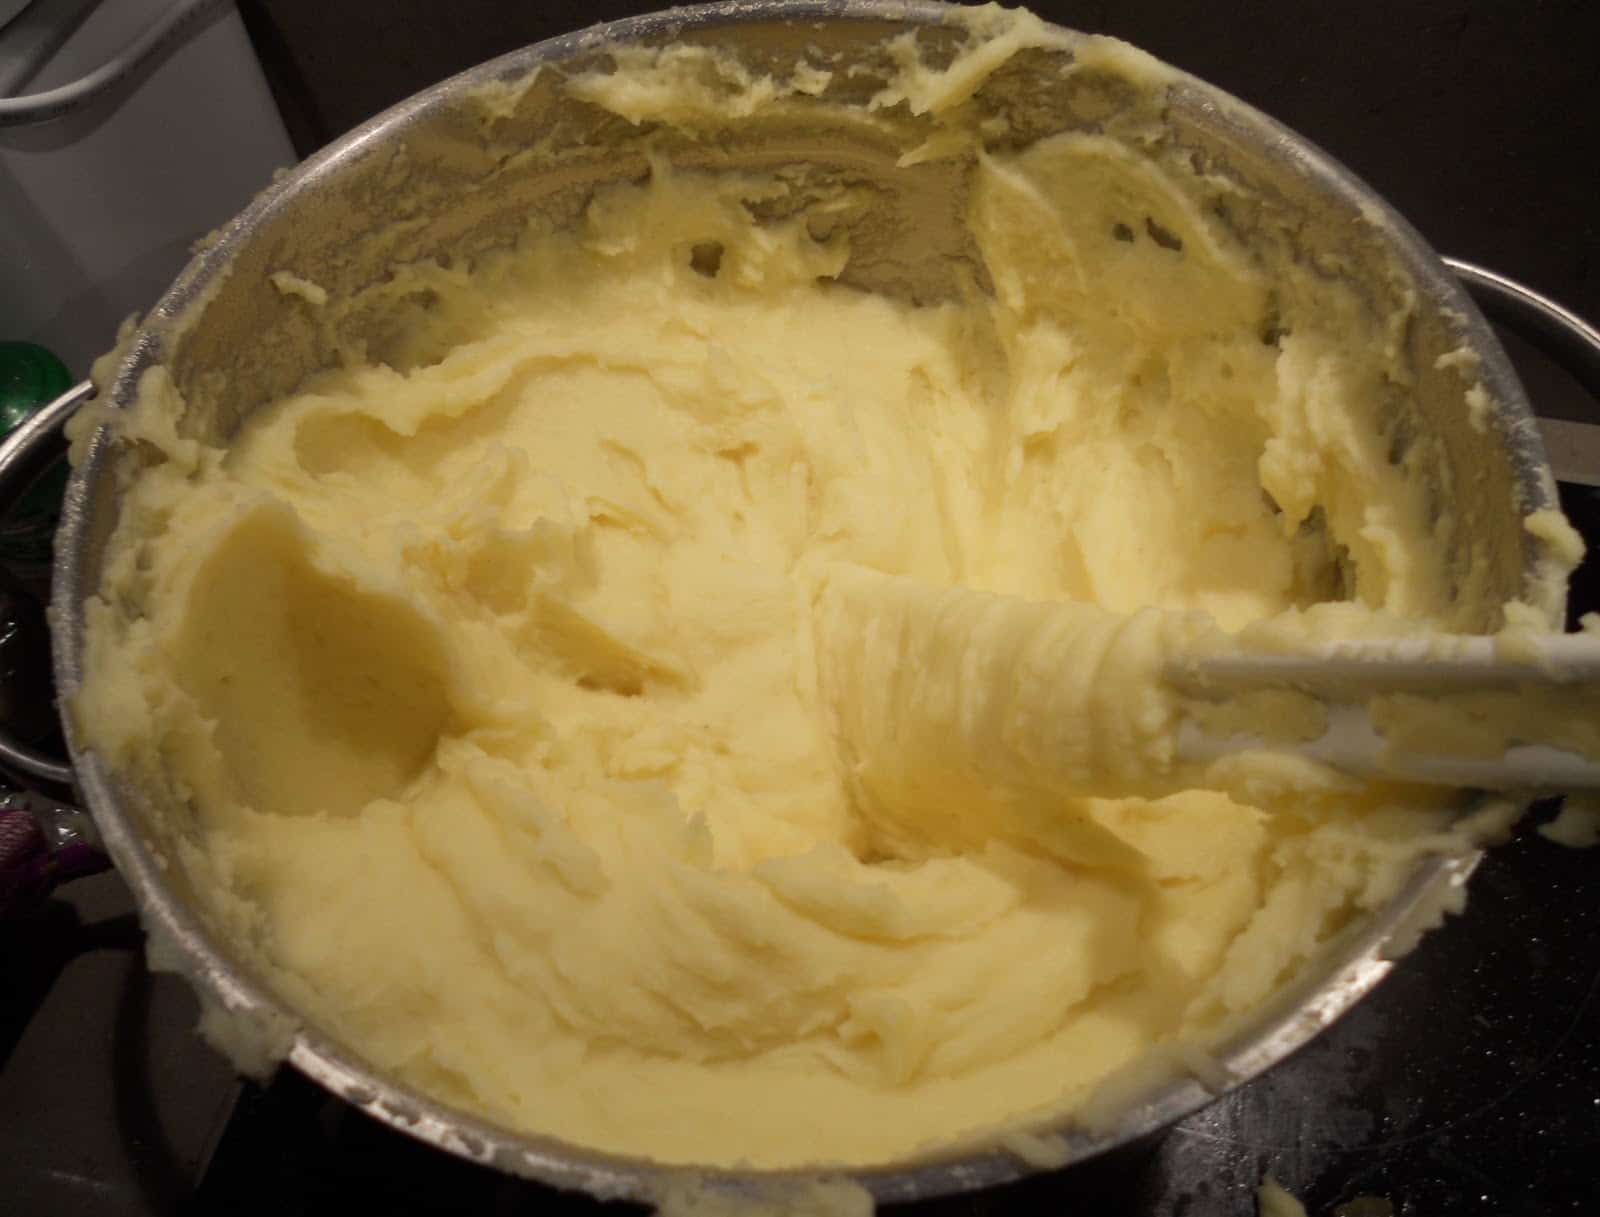
-Strain your potatoes and then MASH them with the cubes of butter. I like to use a vegetable grinder (as pictured), since it makes the potatoes perfectly smooth. However, you can mash your potatoes with an electric mixer or by hand. Whatever floats your boat.
-Heat your milk with a couple pinches of salt and a pinch of nutmeg. As soon as the milk is hot, incorporate it slowly into your potatoes. You may not need all of it, depending on the consistency you’re aiming for!
-Sample your potatoes, and add salt to taste.
*NOTE: If you are not serving your potatoes right away, put a few pieces of butter on top to prevent a skin from forming and cover them with plastic wrap. You can re-heat them on the stove whenever you’re ready.
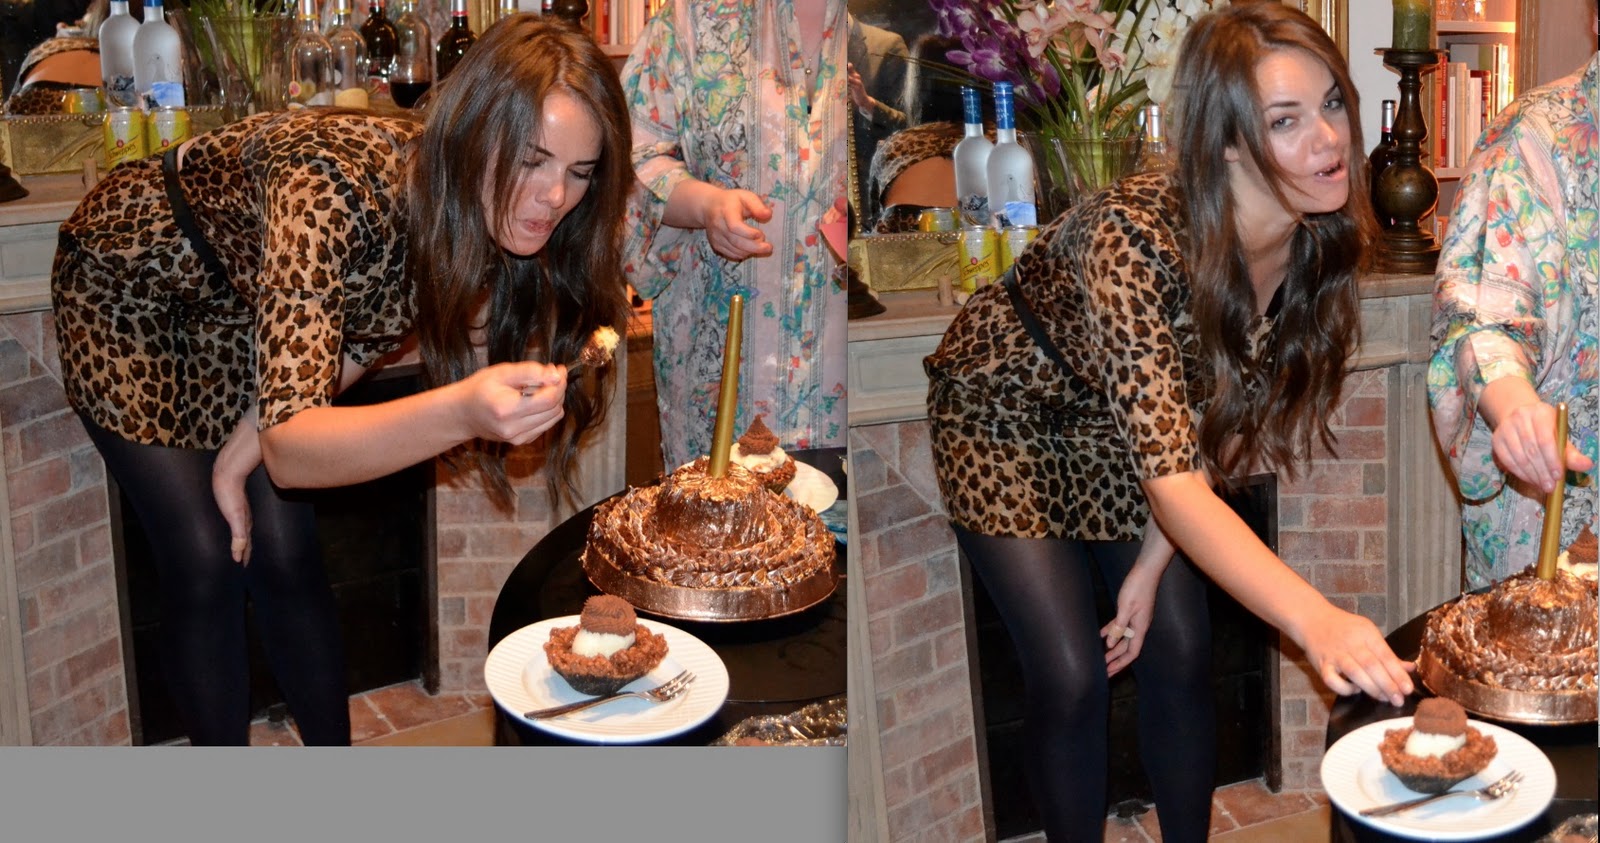
Since it was Serena’s 24th birthday (eek), I decided to pull out all the stops. Not only did I do all the grocery shopping, I made TWO desserts. Okay, so the grocery shopping didn’t exactly work out that well (it’s the thought that counts, right?), and the only reason I made two desserts was because Serena’s request was embarrassing, but whatever.
As much as I hate to admit it, I made a boxed cake. Since it was Serena’s birthday and she made only one request, I acquiesced: Duncan Hine’s moist deluxe yellow cake mix and from the plastic container chocolate icing. Don’t worry, it was SO pretty! To assuage my hurt feelings that she wanted me to make her some stupid boxed cake, I also experimented with a second dessert: Chocolate Crisp with candied orange ice cream and decadent chocolate mousse. Take that you old maid who doesn’t appreciate my desserts!
*For the full recipe for Chocolate Crisps and Delicious Boxed Cake see Desserts by Liberty Tab
Chocolate Crisps (Okay, fine…Chocolate rice krispie treats):
*Makes 16 finished desserts (can easily half the recipe but we like leftovers cuz the calories don’t count…duh).
Preparing your crisps:
-In a large saucepan melt the butter (diced into cubes for even melting) over low heat.
-Add the marshmallows once the butter is melted, stirring occasionally.
-Melt chocolate over a double boiler.
-When butter/marshmallows has turned into a mushy goo, add melted chocolate. Mix.
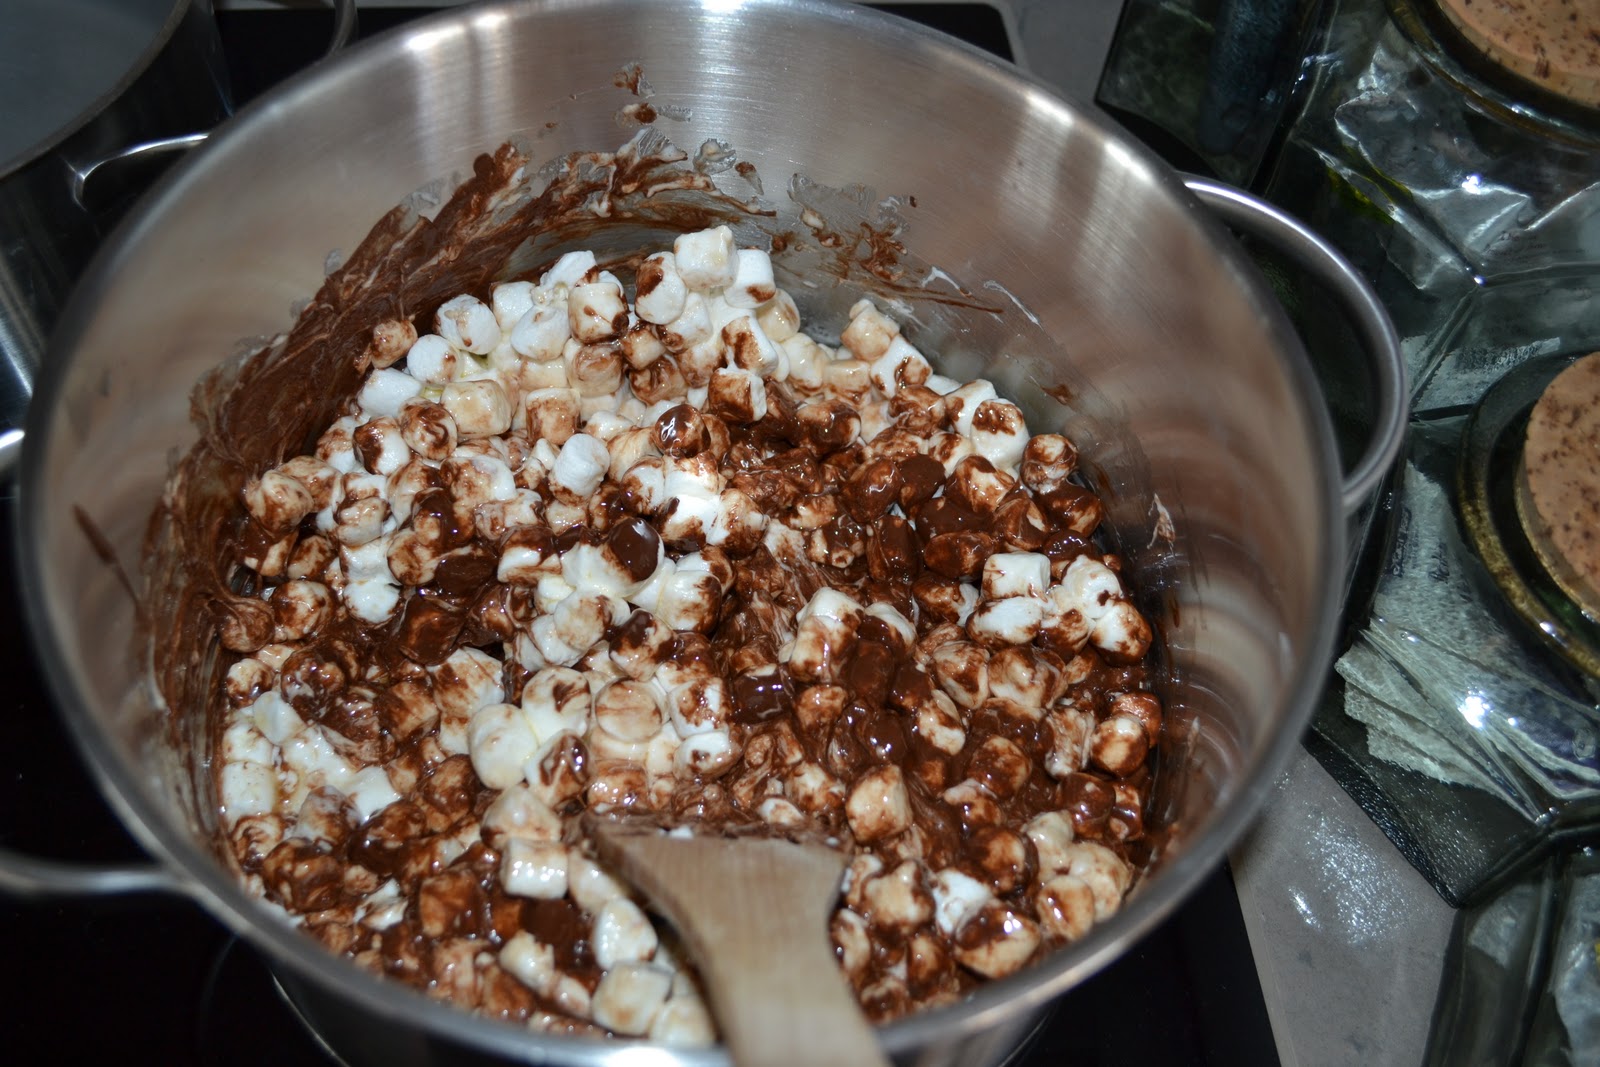
-Add rice krispies off heat.
-Mix very well, really scraping the bottom of the pan.
-Let this mixture cool for about 3 minutes before molding
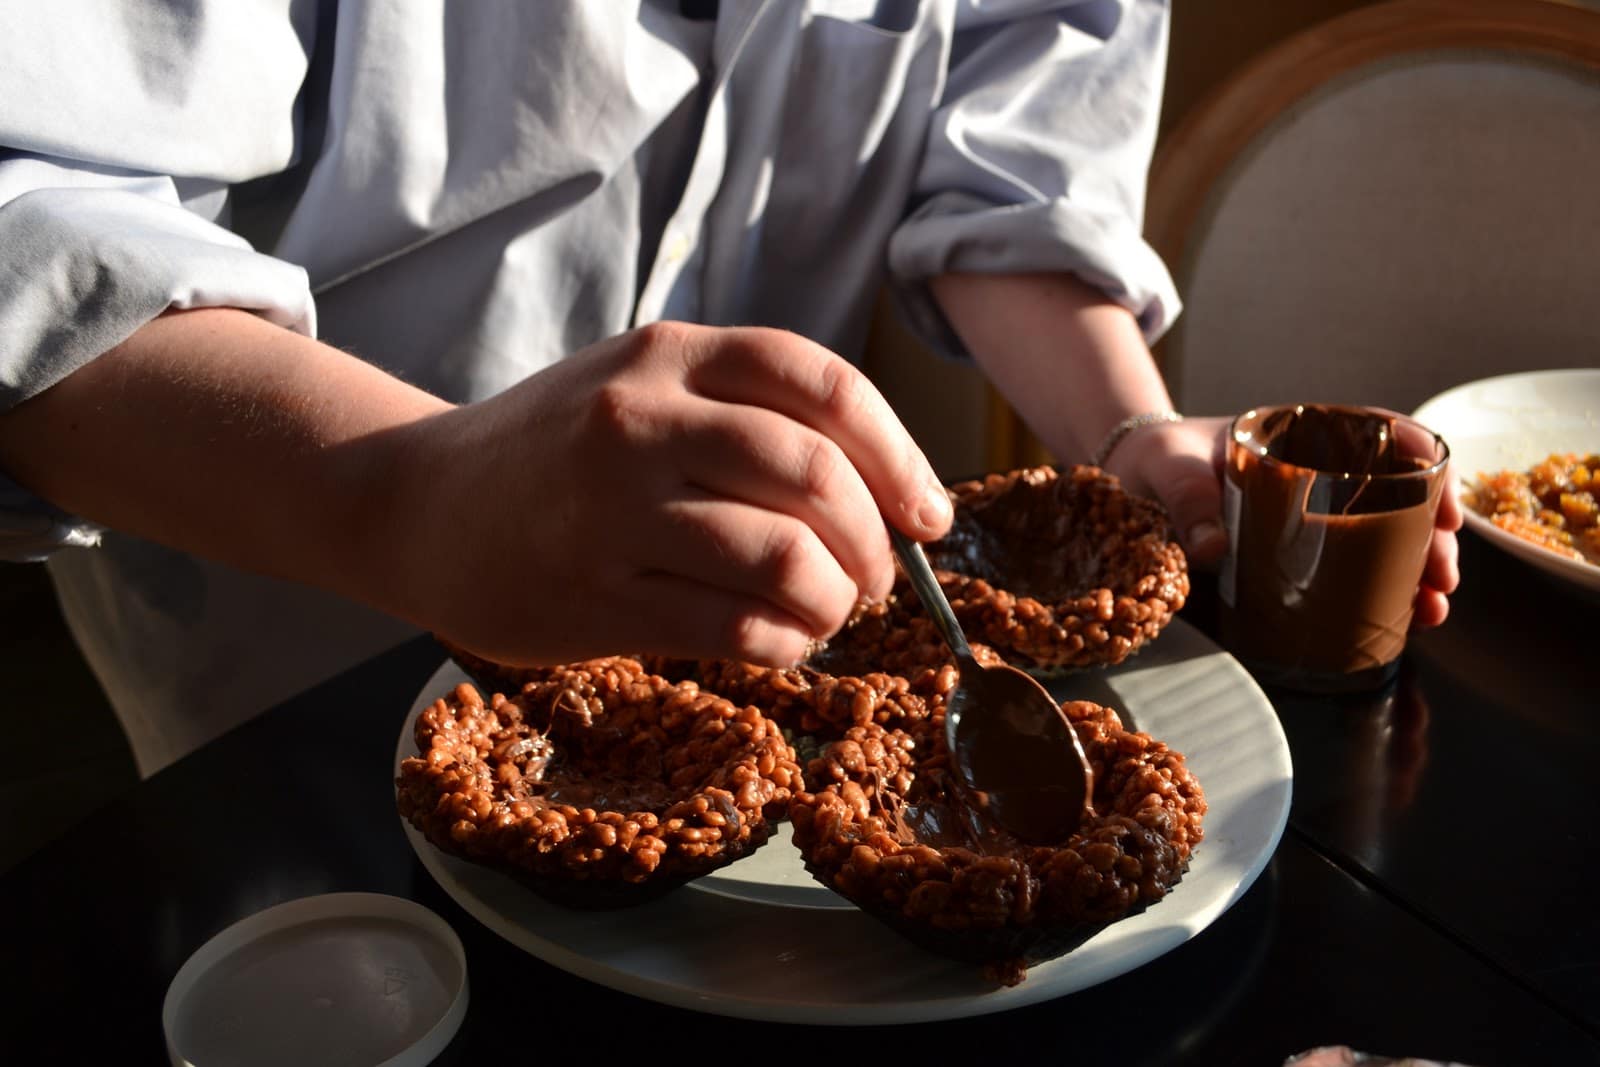
Molding your crisps:
-Rub your hands with butter so very greasy.
-Grab a fist-sized chunk of rice krispies and pat flat like a pancake
-Shape into a bowl

-Go back and touch up any mistakes (should be easy to maneuver at this temperature).
-Put the crisps in the refrigerator.
-Let them cool in fridge for about 30 minutes. Then use a spoon to spread a very very thin layer of nutella in the bottom of each crisp (optional). Then back in the fridge!
*NOTE: Grease your hands before shaping each portion or else it really doesn’t work!
Preparing your ice cream:
-Peel the orange skin (use a peeler, it works perfectly!). Try to get the biggest slices possible, but don’t worry too much if they aren’t perfect.
-You need to blanche the orange peel 3 times.
This means that you put the orange peels in a saucepan, cover them with cold water and bring the water to a boil. As soon as the water is boiling, remove it from the heat, and strain the orange peel. Repeat this process three times.
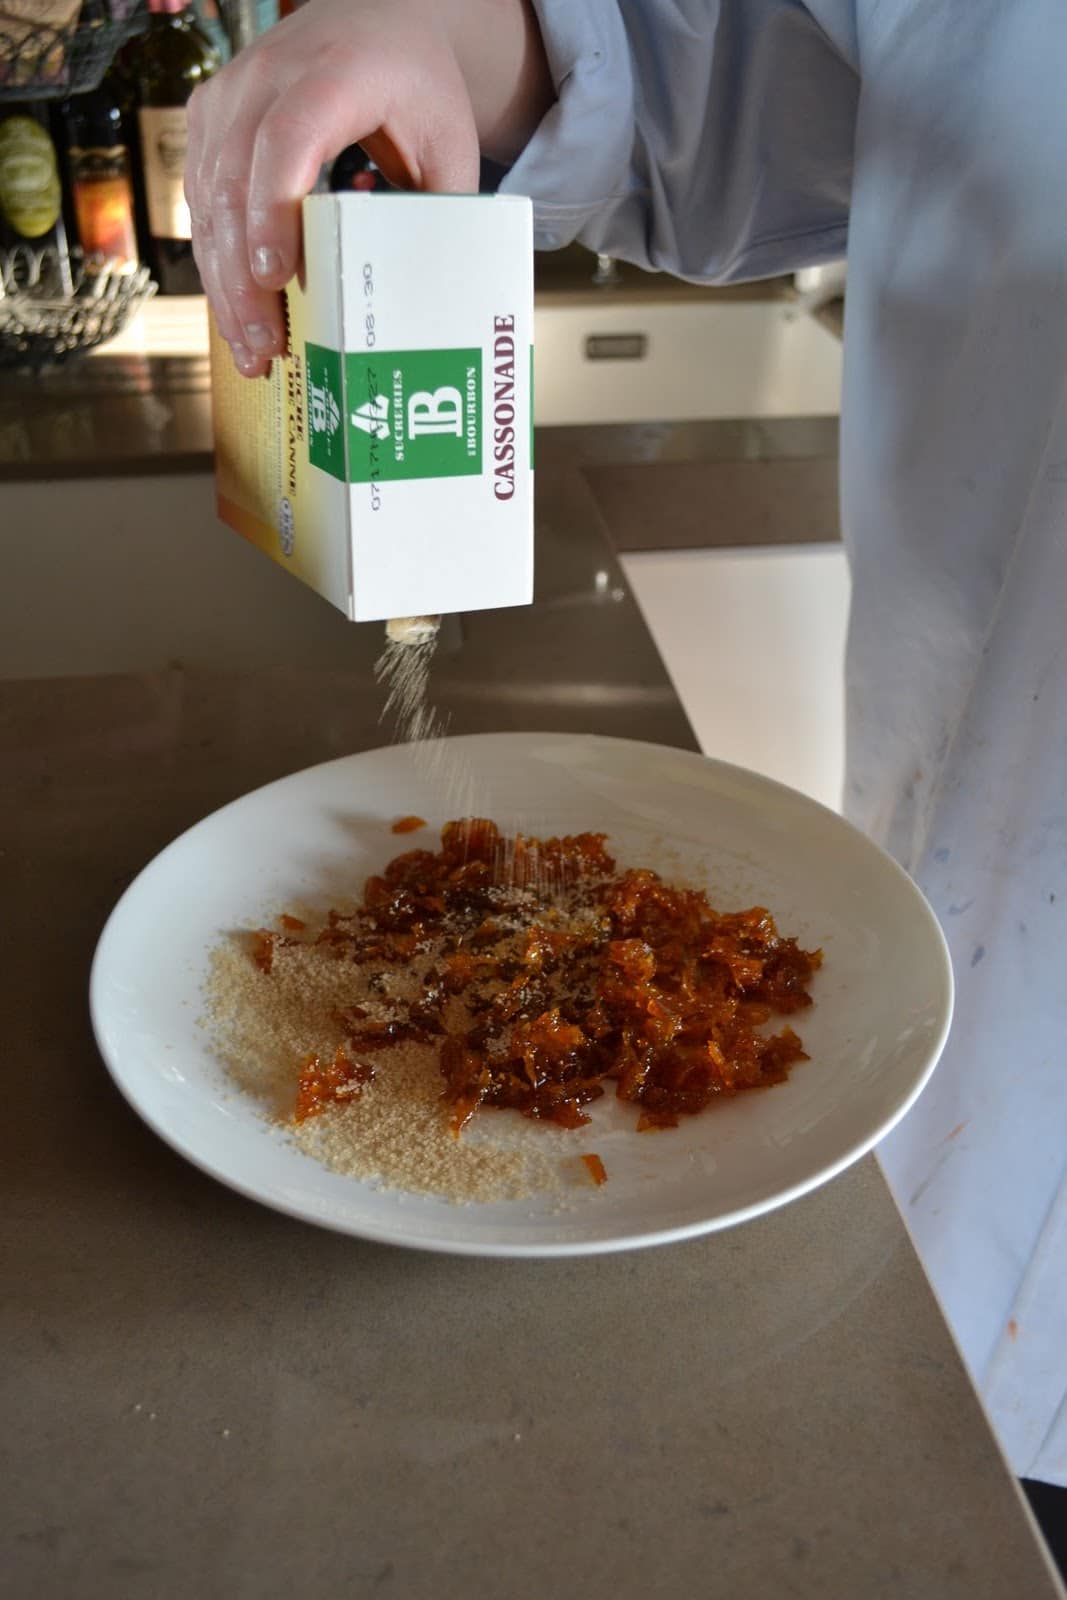
-In another saucepan, mix 3 cups of water and 3 cups of brown sugar. Bring this mixture to a boil.
-As soon as the sugar mixture boils, add the orange peel that has been blanched three times.
-Boil for about 10 minutes, keeping a close eye on it. (I didn’t, and it spilled everywhere…not fun to clean up sticky sugar.)
-Strain the candied orange peel.
-NOW, take out the vanilla ice cream and set it aside to soften while the orange peels are cooling.
-Once the orange peels are cooled (about 10 minutes), pour ¼ cup of brown sugar on top and mush it around with your hands so the orange peels are covered in a thin layer of sugar.
-Put all the orange peel in the bowl and with a masher. If you don’t have this very fancy equipment, you can use a big spoon like I did to mix the orange peel into the vanilla ice cream.
-Cover tightly with saran wrap (VERY TIGHTLY or you get gross icy ice cream), and put your ice cream back into the freezer to firm up.
-Let your friends help clean up the extra, especially the birthday girl.

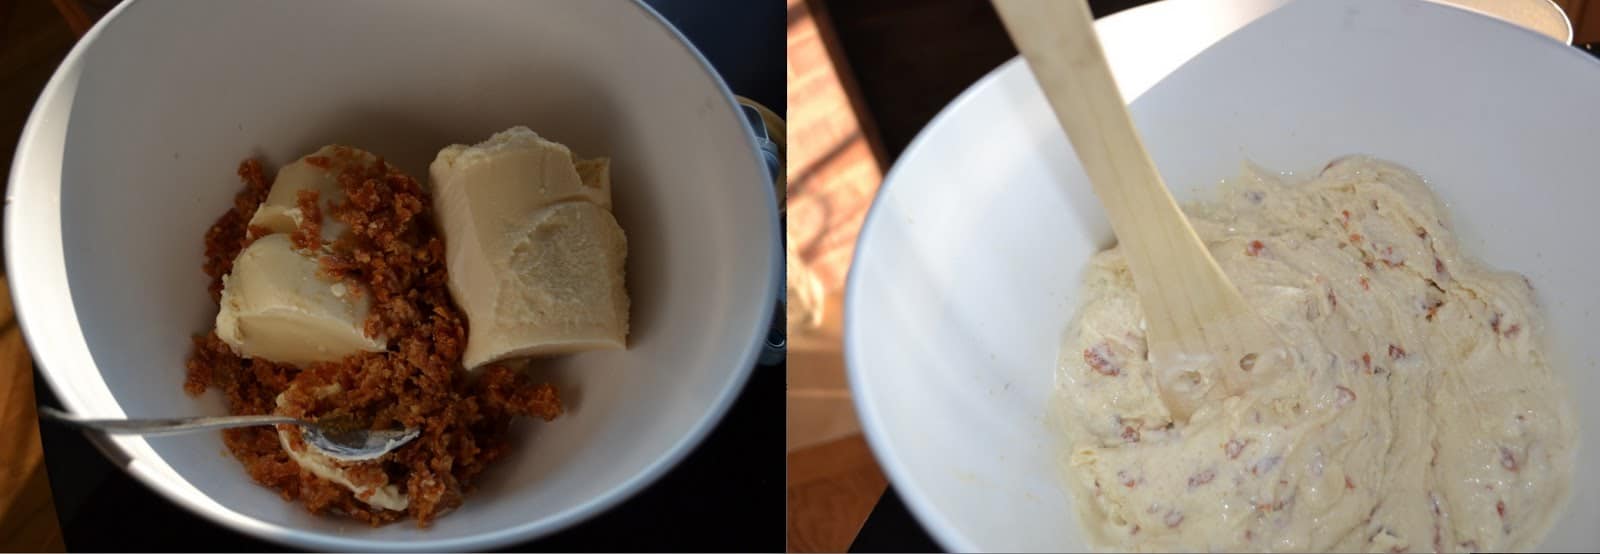
Chocolate Mousse
Ingredients: 3 cups milk chocolate 3 ½ cups heavy cream
Preparing your mousse:
-Melt the chocolate over the double boiler.
-Put the heavy cream in a large mixing bowl.
-When the chocolate is melted, pour it into the heavy cream.
-Stir with a whisk making sure the mixture is well incorporated.
(I find it necessary to finish stirring it with a spatula to really get everything mixed in well.)

–Put saran wrap directly in contact with the mixture (this prevents a gross skin from forming on the top), and put the mousse in the fridge to cool.
*This is by far the hardest part of the recipe-you cannot let the mixture get too firm. I would say it should stay in the fridge for no more than 40 minutes or else it will get too hard. It should be a very thick substance but not “hard.”
-After 40 minutes or so, remove the mousse from the fridge and whip it with an electric mixer until it has a thick, smooth consistency
** The other option is too simply take it out of the fridge after 40 minutes and let it sit (no more than half an hour because cream can go bad, people). Make sure to whip it up right before you serve it
-Whip up the Chocolate Mousse.
-Scoop the ice cream into the crisp cups.

-Put chocolate mousse into a piping bag and decorate (see technique sections for decorating options)
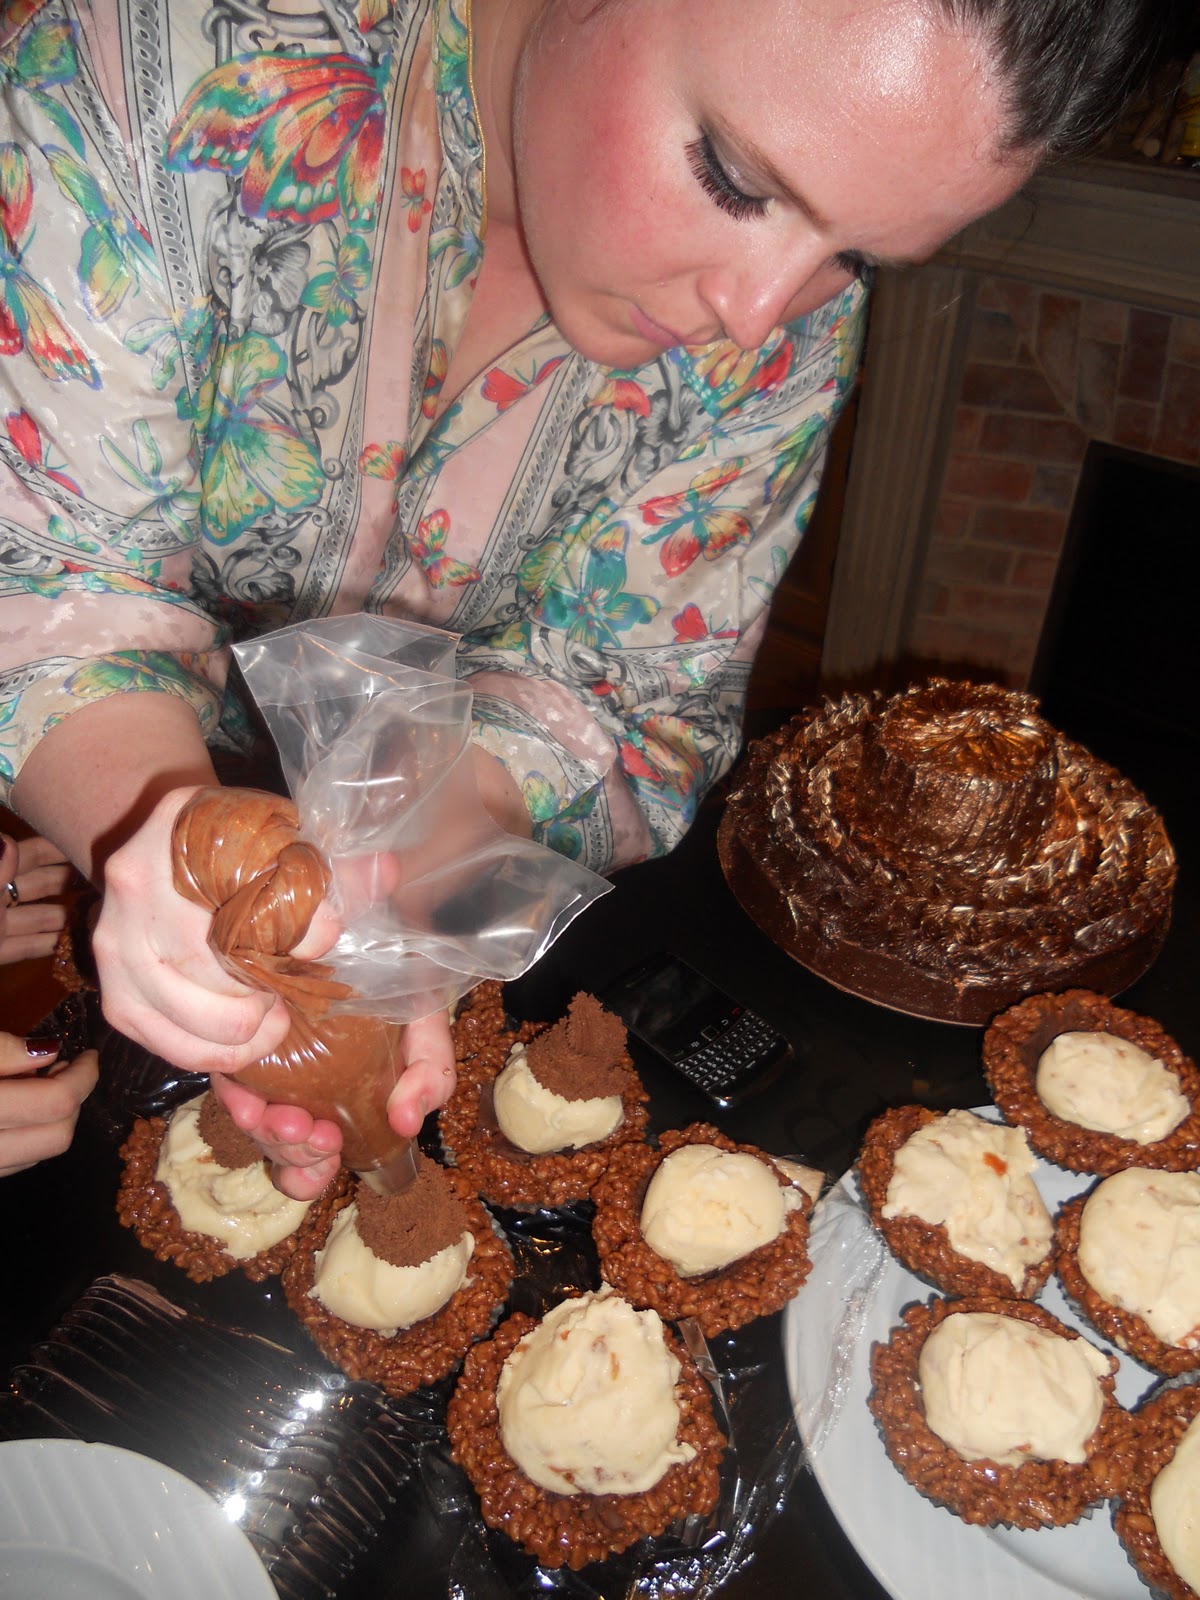
Decorations: (optional)
-Shaved chocolate.
-Leftover candied orange peel.
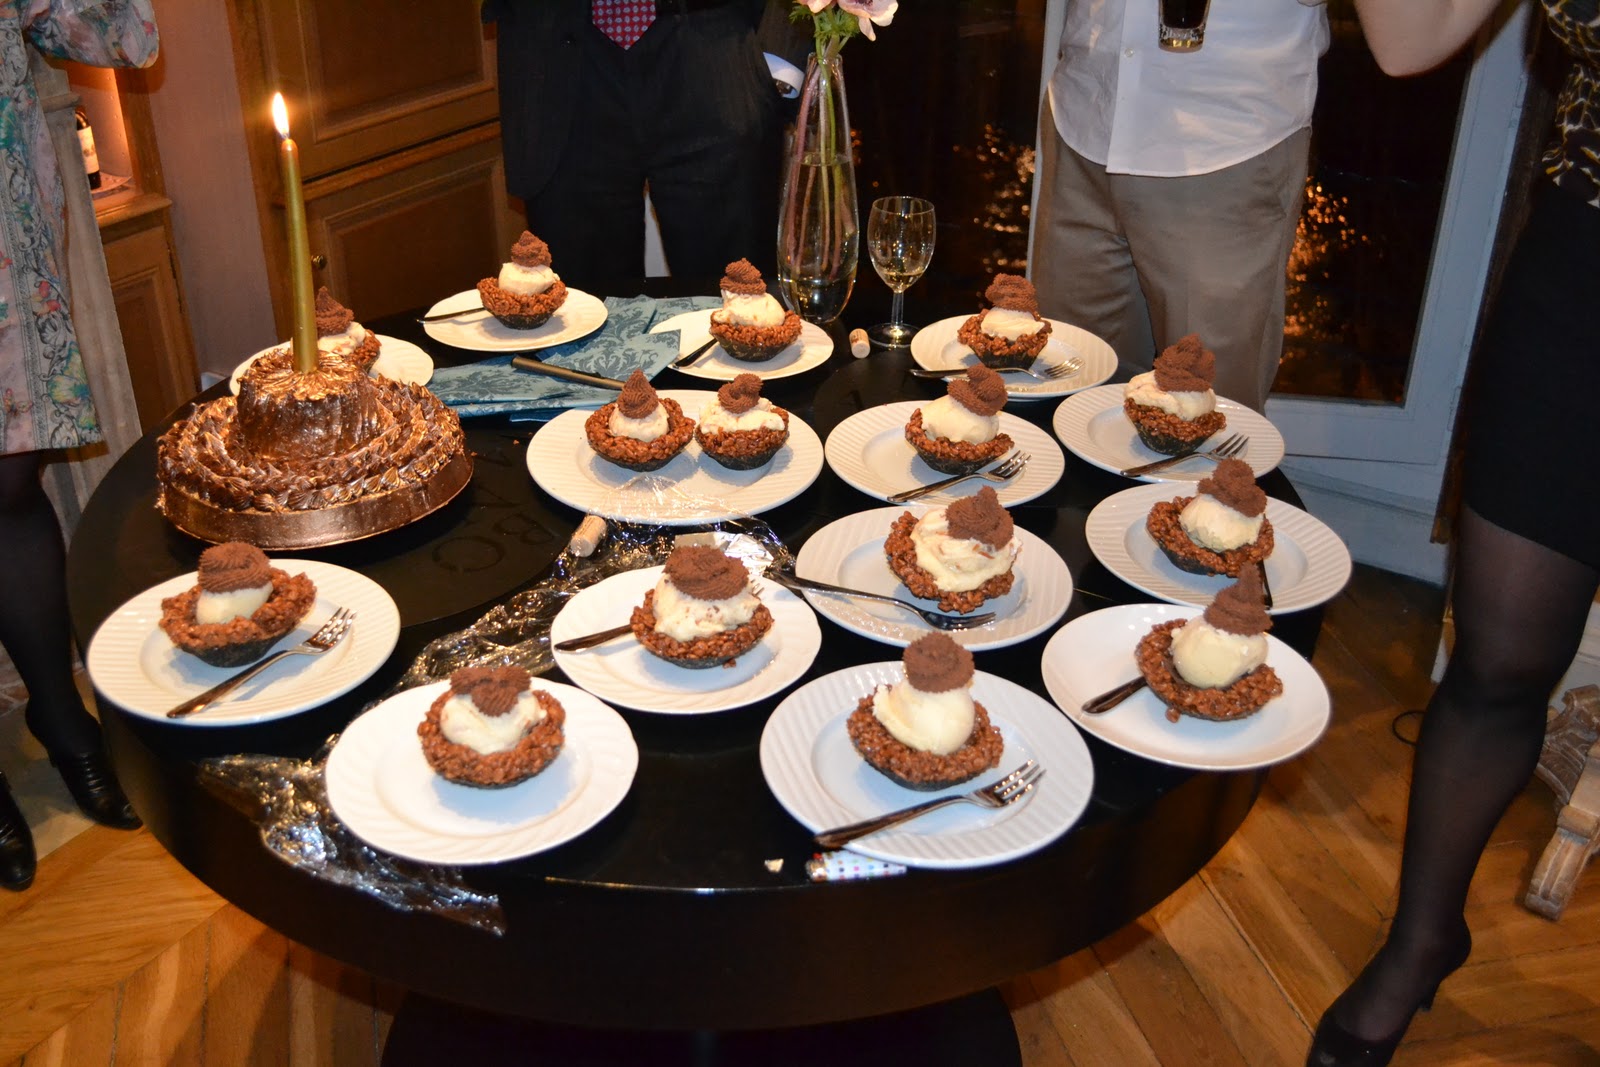
Serena’s Boxed Cake:
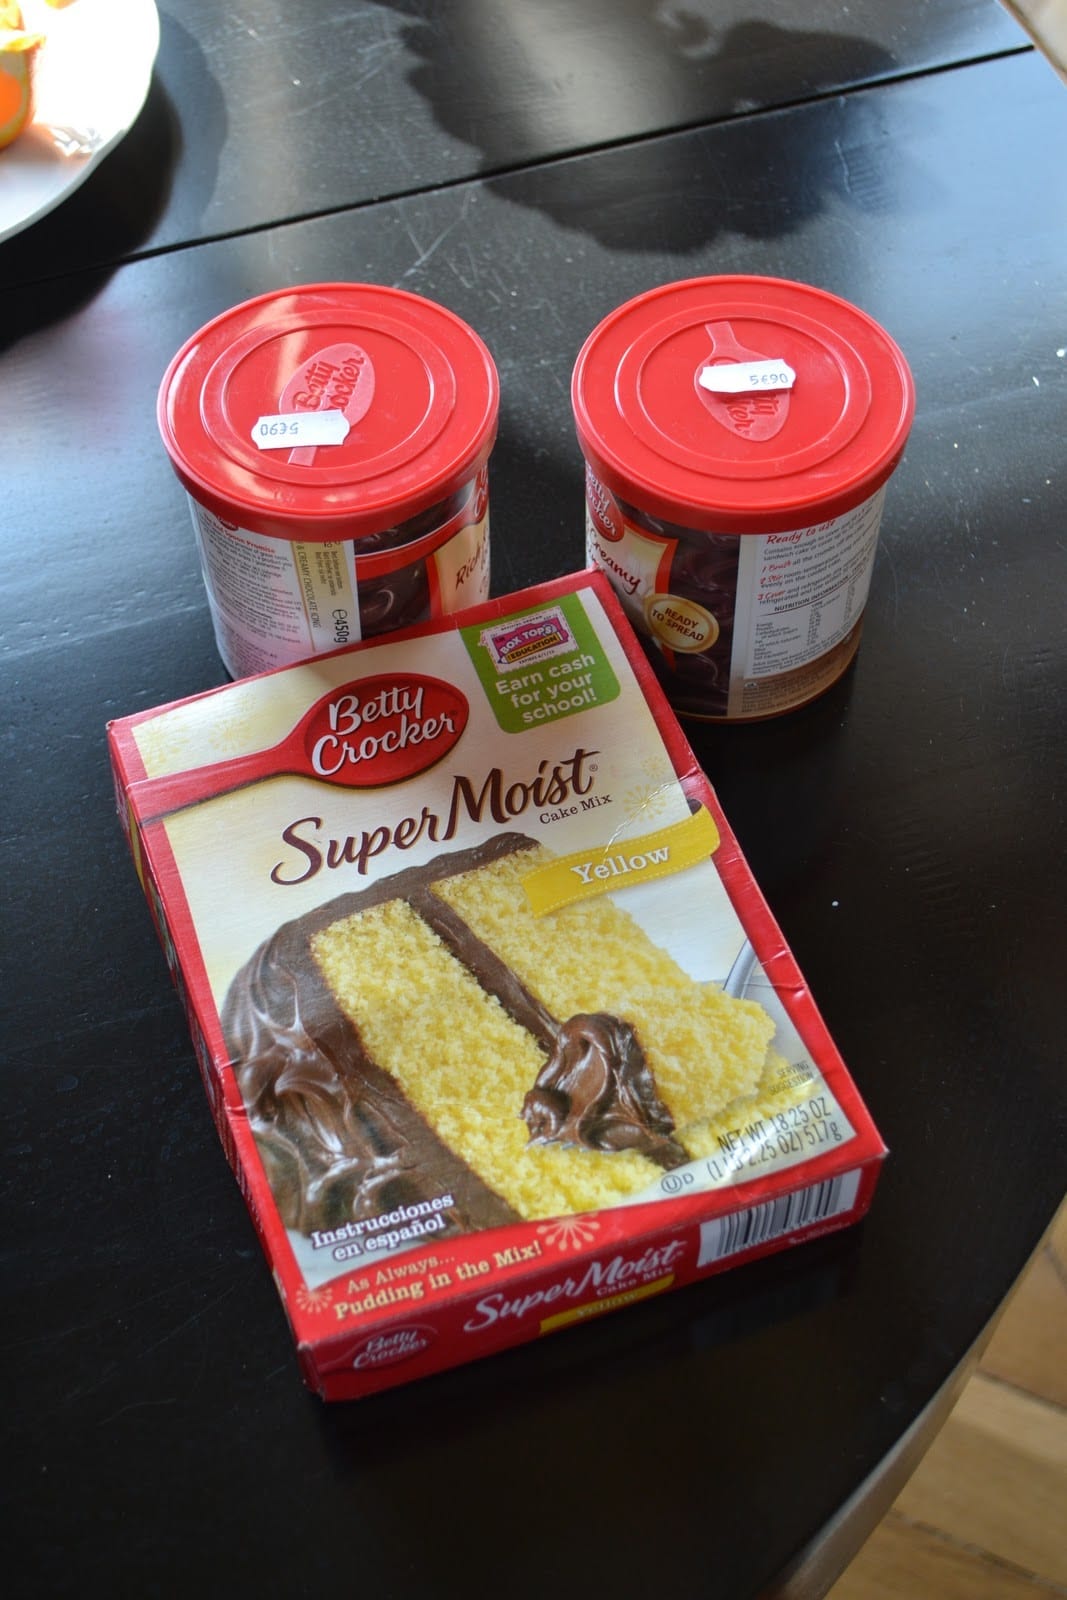
It was Duncan Hine’s moist deluxe yellow cake mix and from the jar chocolate icing for the birthday girl. (I know the picture has Betty Crocker, but Duncan Hine’s is so much better (just harder to come by in Paris).
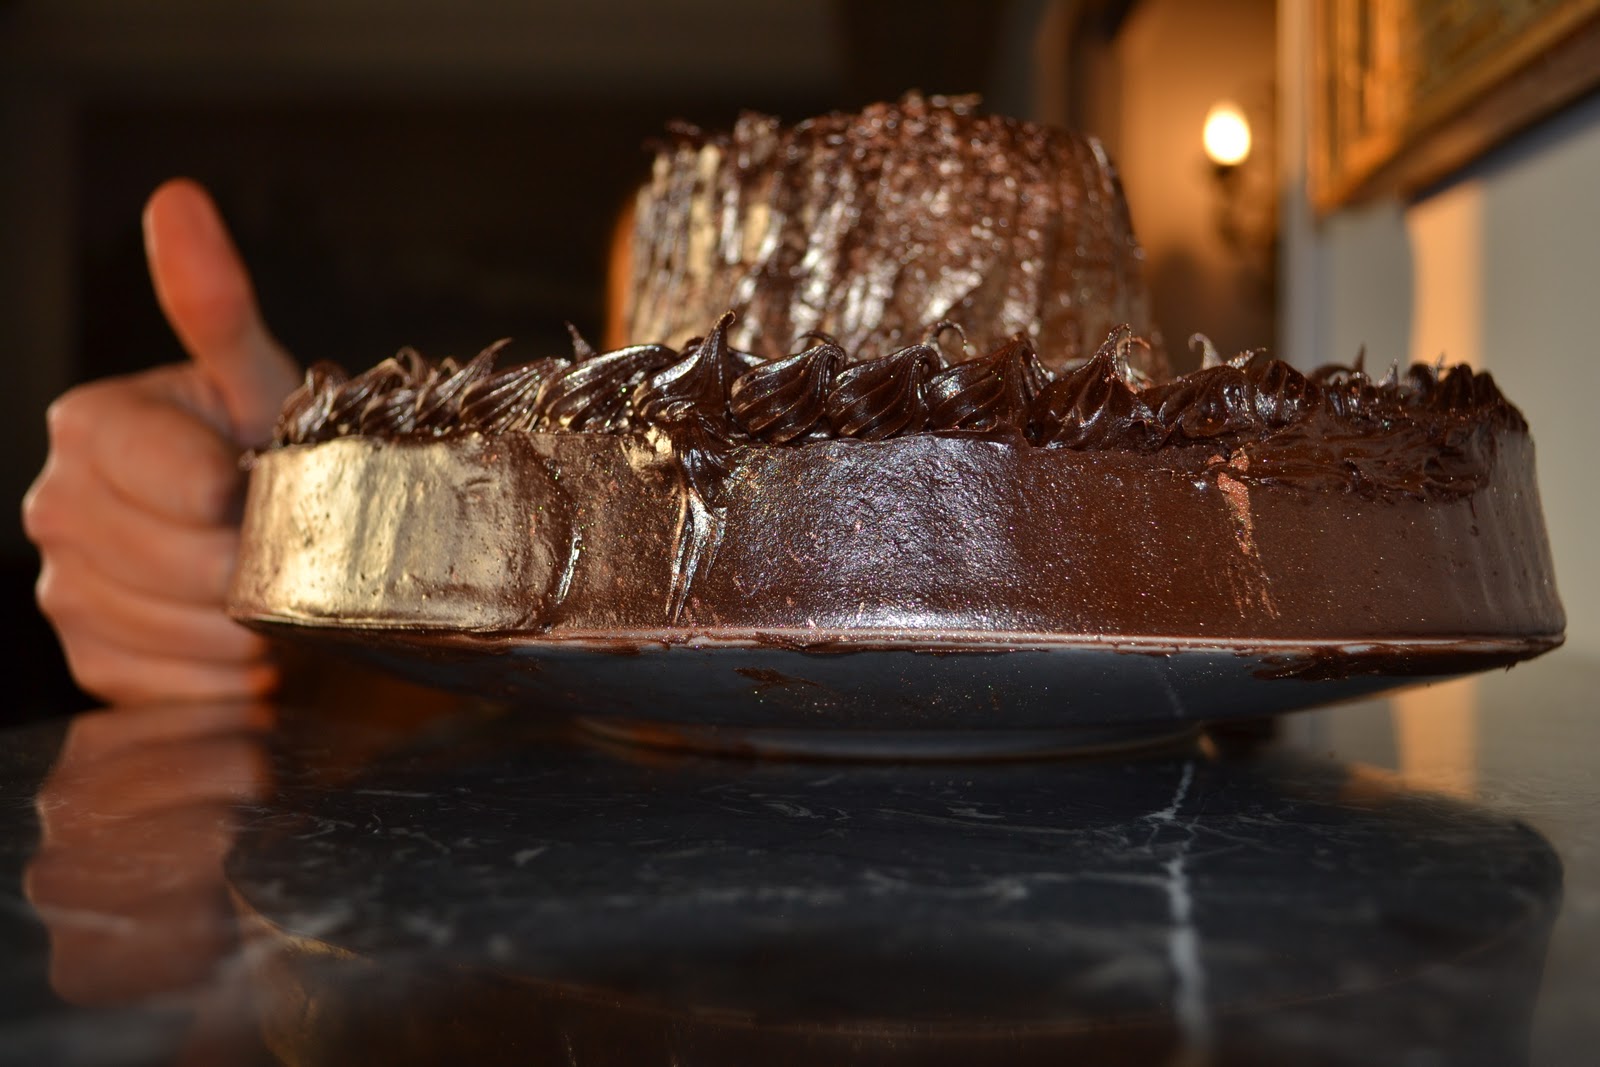
Since I was going to make a boxed cake, I decided that I would use my newfound patisserie skills to spruce it up a bit. So, here you go: How to make a Boxed Cake look freaking awesome. (You can do it, I promise!):
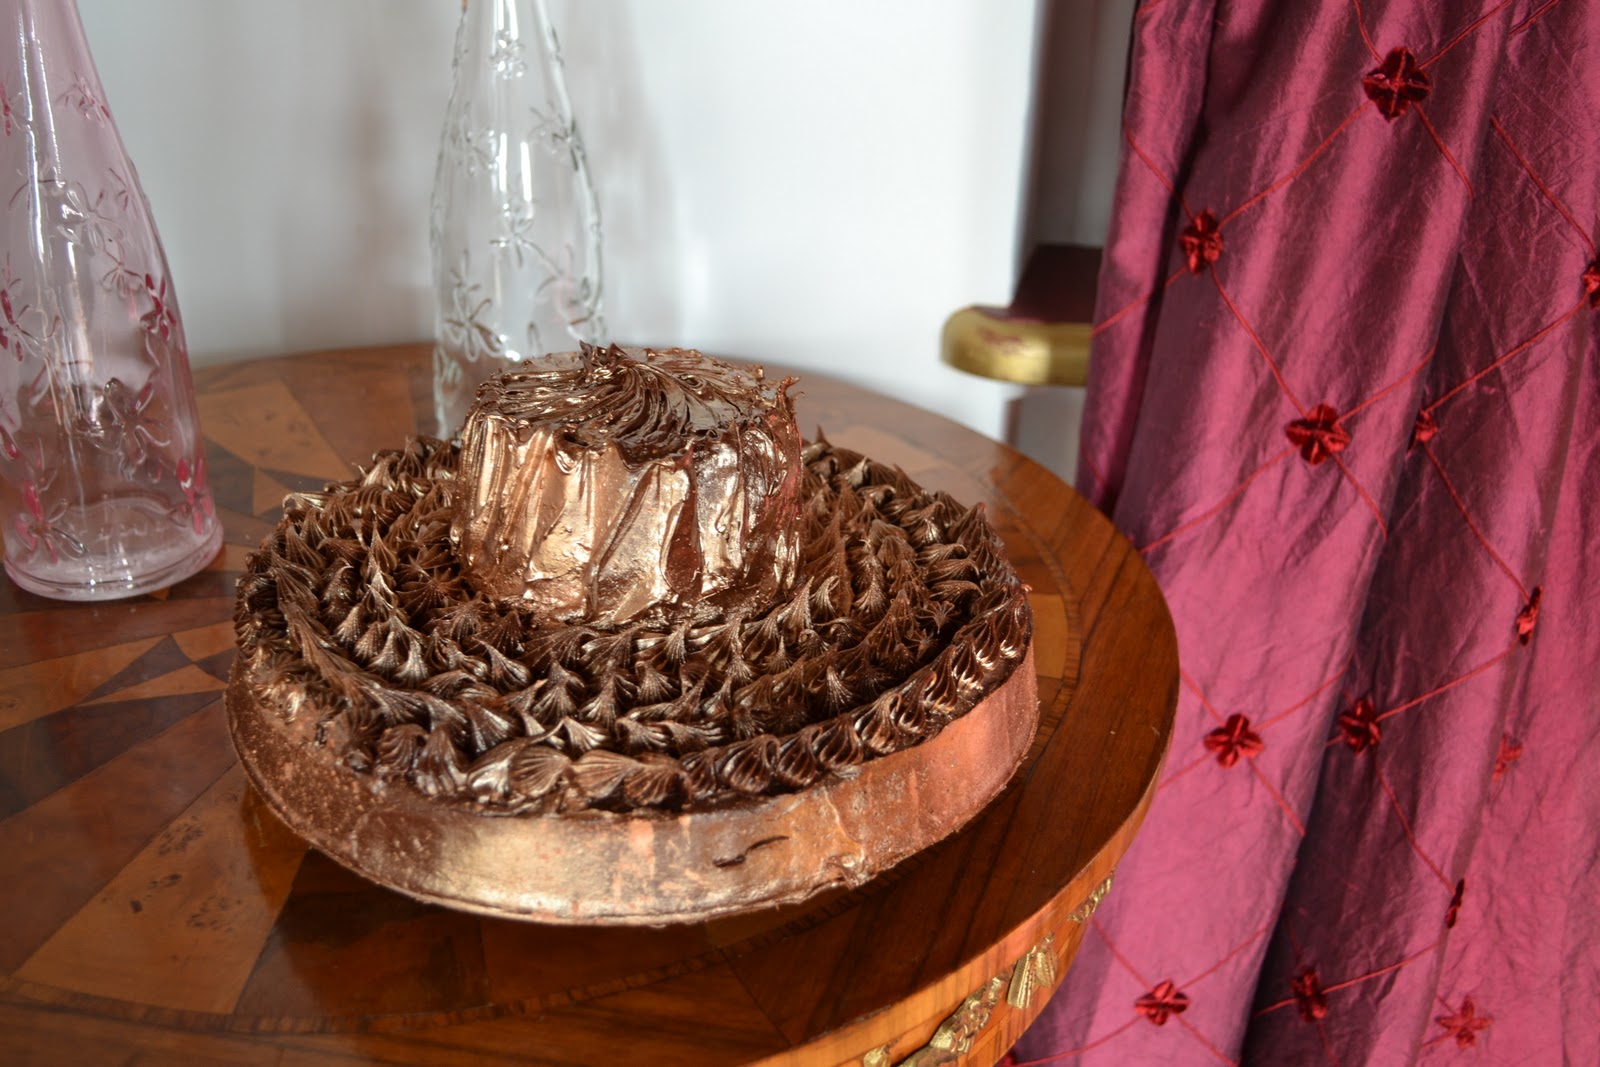
Instead of using the suggested molds on the back of the box, I tried something else. I bought three different-sized round pans. Aluminum pans don’t seem to exist here, but at any big grocery store they have disposable round baking pans. Buy a couple of those aluminum ones if you don’t have different-sized round pans. I chose a 10in diam, 6in diam, and 4in diam.
Ingredients:
Molds
Boxed cake
Whatever ingredients the boxed cake tells you to get
2 cans of icing (or 3 if you really like icing)
Pastry bag and decorating tip
Preparing your cake:
-Grease the molds REALLY WELL. (Butter always makes things taste better anyway, and boxed cake can use all the help it can get.)
-Follow the directions on the back of the box.
*To make your cake a bit more moist, I always increase the oil and decrease the water. For example if the box calls for 2/3 c oil and 2/3 c water, I do 1 cup oil and 1/3c water…can’t hurt, right?
-Follow the directions for baking time and temperature, but your best test is to stick a toothpick in the middle of the cake. If it comes out clean, then clean out your oven!
*MOST IMPORTANT STEP: HIDE THE EVIDENCE
-Turn out your cakes onto a cooling rack mainteNOW! (In french we say ‘maintenant,’ meaning ‘now,” but Chef X always said mainteNOW to try to be cool and funny…)
-When your cakes are completely, totally, and utterly cool, you can begin icing them.
-Ice the top of the biggest layer, and then ice the next biggest layer, and stack it.
-Place the smallest layer on top and ice the whole sucker.
-That should take about 1 jar of icing (or 1 ½ jars if you really like icing).
-Now, comes the important part. Anybody can make a boxed cake (that’s the point), but not everyone can make it look beautiful. This is what I’m going to teach you.
-Follow the technique section and create your own masterpiece (or you can just copy what I did on the picture…whatever). Go freestyle and artsy with roses all over it, or be perfectly symmetrical. Go wild.
The SECRET:
I went to a specialty store and bough edible gold dust. (William Sonoma definitely has this, and I will find some other links to share with you for ordering online.) You put it on the tip of a knife and just blow it around the cake to cover the whole thing. Don’t freak out about germs. People blow out birthday candles all the time and nobody gets sick. Et voila! A beautiful boxed cake!
Roast Chicken with Jus
Ingredients
- 1 Chicken, approx 2kg or 4.5 lbs
- 2 lbs chicken wings
- 2 large carrots
- 1 celery stalk
- 1 onion
- 2 garlic cloves- crushed
- thyme, a few sprigs
- 1 bay leaf
- 1/4 cup butter
- salt, pepper
Instructions
Preparing your chicken:
- Pre-heat the oven to 350 degrees.
- Cut the wings off just below the joint. (If necessary please also remove the feet and neck…)
- Make sure that the cavity of the chicken is clean. This means you need to remove any renegade organs/innards. If you’re squeamish, I recommend wrapping your hand in some paper towel and then swiping the cavity a few times. Season the cavity with a couple pinches of salt and a pinch of pepper. Then add your two crushed garlic cloves (just smack the cloves with a knife, no need to peel them!), and a couple sprigs of thyme.
- Rub the chicken’s skin lightly with oil. (This will help the skin to crisp). Season with salt and pepper.
Preparing your aromatic garnish:
- Peel your carrots, celery, and onion, and then chop each mirepoix- this is a fancy French term that I shall poetically translate as “rough cubes.”
- Chop the chicken wings into small pieces. (This is best done with a cleaver, but a sharp knife will also do).
- Heat some oil in a saucepan, and when it is very hot (spitting), add the chicken wings. Keep on the heat until they are a golden brown, stirring intermittently. Remove from heat.
Cooking your chicken:
- Place the chicken in a roasting dish on its side. Add 1 or 2 slices of butter to the skin and put the bird in the oven.
- After 15 minutes turn your chicken onto its other side and baste it with some of its juices. (You don’t even need a baster! Just use a spoon to collect the juice and pour it over the chicken).
- After another 15 minutes, add the vegetables and browned chicken wings to the roasting pan. Place the chicken breast-side up on top of the garnish. Cook for 20 more minutes. Boom! Remove your chicken from the oven and cover with aluminum foil until ready to serve.
Preparing your jus:
- Strain the fat from the chicken wings and vegetables that were roasted with your chicken.
- Brown the trimmings in a saucepan on medium to high heat. When brown, deglaze the pan with a little white wine (or water). This should clean the bottom of the pan and help the trimmings to absorb flavor.
- Add water to cover the trimmings and allow to simmer for at least 10 minutes.
- Strain the jus with a fine mesh strainer, and keep on the heat to reduce until it has a slightly syrupy texture. Add salt and pepper to taste.
Carving your chicken:
- Each bird serves four people. There will be two thighs and two breasts (just stating the obvious).
- Remove the thighs first, cutting gently around the thigh joint (what most people thing of as the drumstick), and pull the meat away from the carcass.
- To remove the breasts, cut along the center line of your chicken. Once you find the spine, cut on either side of it to remove the breast meat. Just follow the line of the bones with your knife.
Like this? Leave a comment below!